



How to Replace Your Water Filter: A Step-by-Step Guide for Eco-Friendly Living
Replacing a water filter is one of those home maintenance tasks that seems minor until you understand how much depends on it. A well-maintained filter can support better tasting water, help your system perform as intended, and reduce the likelihood that you are running water through a cartridge that is past its useful life. Just as importantly, timely replacement can help you avoid unnecessary waste by keeping the system efficient instead of waiting until performance drops or parts wear out prematurely.
Table Of Content
- Why water filter replacement matters more than people think
- Know your filter before you start
- How often should you replace your water filter?
- Common signs a filter may need attention
- Tools and supplies to gather first
- Step-by-step: how to replace your water filter
- Step 1: Confirm the exact replacement cartridge
- Step 2: Wash your hands and prepare the area
- Step 3: Shut off water pressure if your system requires it
- Step 4: Remove the old filter carefully
- Step 5: Inspect O-rings, gaskets, and seals
- Step 6: Install the new filter in the correct orientation
- Step 7: Restore water and check for leaks
- Step 8: Flush the system exactly as directed
- Step 9: Reset the indicator and record the date
- Filter-specific notes for common home systems
- Pitcher filters
- Faucet-mounted filters
- Refrigerator water filters
- Under-sink carbon systems
- Reverse osmosis systems
- Common mistakes to avoid
- Responsible disposal and recycling of old water filters
- Practical disposal checklist
- How filter maintenance supports a lower-impact home
- When to test your water or seek professional help
- A simple maintenance rhythm to keep going
- Final thoughts
For many households, water filtration has become part of everyday life. It may be a simple pitcher in the fridge, a faucet-mounted unit, a refrigerator filter, an under-sink carbon cartridge, or a reverse osmosis system. The good news is that changing most of these filters is very manageable, even if you do not consider yourself especially handy. With a little preparation and the right replacement cartridge, the process is usually clean, quick, and reassuringly straightforward.
The environmental side matters too. According to the EPA, all home water treatment systems require ongoing maintenance, and filters should be replaced according to the manufacturer’s instructions and schedule. That guidance is worth taking seriously because neglected systems can become less effective and may even make water quality worse. In other words, filter replacement is not just a convenience issue. It is part of responsible water use and responsible home care.
This guide walks through the process step by step, with a practical focus on what most homeowners and renters actually need to know. We will look at how to identify the right replacement filter, how often to change it, how to install it without common mistakes, and how to dispose of old cartridges in a more thoughtful way. If your goal is clean water with less guesswork and less waste, this is a good place to start.
Key takeaway: Do not rely on taste alone to judge whether a filter is still working. Replacement timing is product-specific, and manufacturer instructions remain the most reliable rule.
Why water filter replacement matters more than people think
It is easy to assume that a filter keeps doing its job as long as water still flows and tastes normal. In practice, that is not a safe assumption. Many filters are certified to reduce specific contaminants only up to a certain usage level, such as a defined gallon capacity or a set time period. Once that threshold passes, performance may no longer match the certification claim, even if the water still seems perfectly fine.
This is especially important if you chose your filter for a specific reason, such as reducing chlorine, lead, sediment, or certain emerging concerns like PFAS. The EPA notes that for PFAS-reduction claims, labels such as NSF/ANSI 53 and NSF/ANSI 58 are important certifications to check. At the same time, EPA also cautions that current certifications do not automatically mean a filter reduces PFAS down to the newest federal drinking water standards. That makes correct selection and correct maintenance equally important.
Regular replacement also protects the system itself. A clogged or exhausted cartridge can reduce flow rate, strain other components, and lead to frustrations that often cause people to abandon the filter entirely. When a system is maintained on schedule, it is more likely to stay useful for years, which is a more sustainable outcome than replacing the whole setup early because the basic upkeep was neglected.
There is also a practical financial benefit. Maintenance and disposal-related costs vary by filter type, brand, and installation style, but replacing filters on time is usually less expensive than dealing with a poorly performing system, reduced appliance efficiency, or unnecessary bottled water purchases. A modest maintenance habit often supports both household savings and lower environmental impact over time.
Know your filter before you start
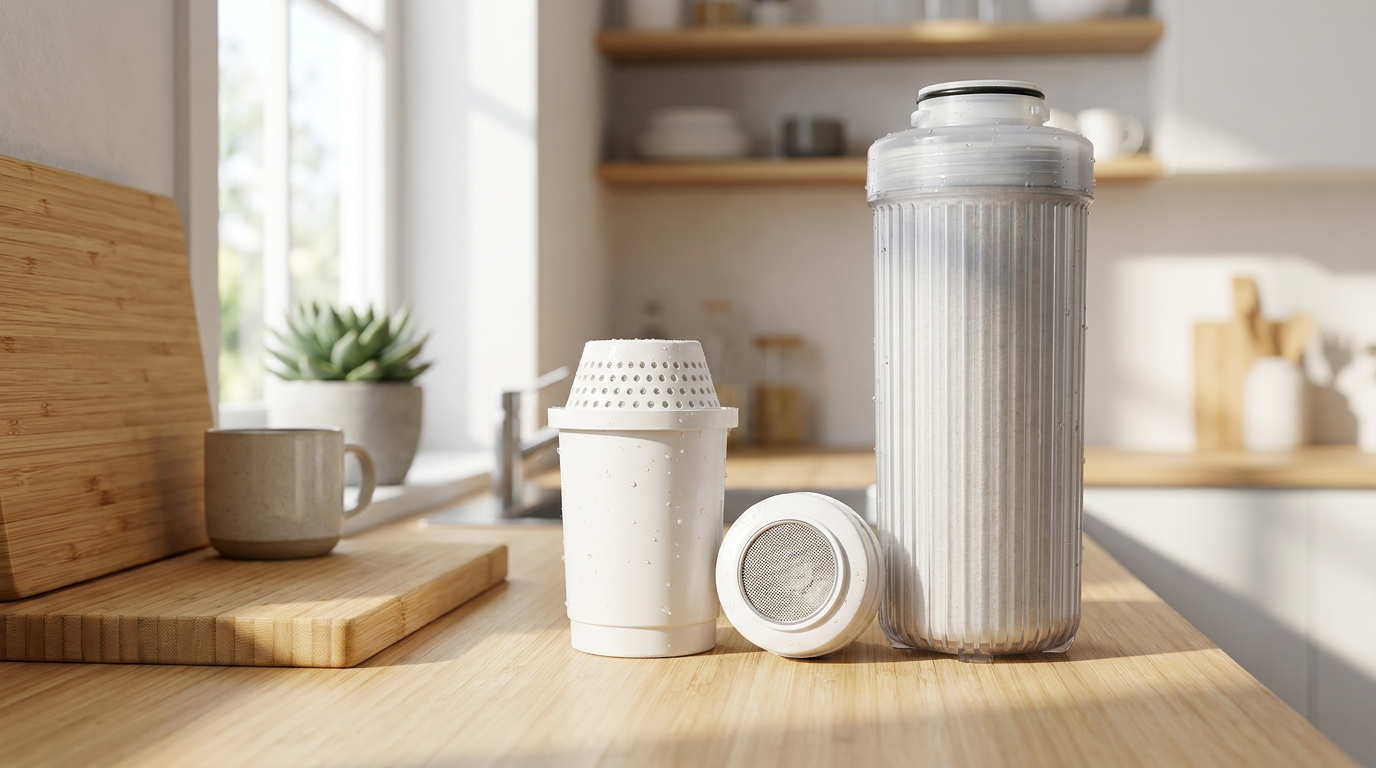
The most important first step is to identify exactly what kind of filter you have. Although the replacement process is broadly similar across products, the details differ. A pitcher filter often lifts out by hand, while a faucet-mounted unit may twist into place, and an under-sink or reverse osmosis system may require you to shut off water pressure before opening the housing. Starting with the wrong assumption is the easiest way to turn a simple task into an inconvenient one.
Look for the model number on the cartridge itself, the filter housing, the owner’s manual, or the manufacturer’s website. If you no longer have the manual, most brands provide digital instructions online. This is worth the extra minute because using the proper replacement cartridge is one of the EPA’s clearest recommendations. Filters are not interchangeable just because they appear similar in size or shape, and using an off-spec replacement can affect performance or cause leaks.
It helps to know whether your filter uses an indicator light, a mechanical timer, a gallon counter, or a simple date-based schedule. Many products in North America now include replacement indicators, but these are still secondary to the manufacturer’s instructions. Water conditions vary from one home to another, and a schedule that works in one household may not be appropriate in another. Hard water, heavy sediment, and high usage can all shorten useful life.
If you are using a reverse osmosis system, take a more complete view of maintenance. EPA materials note that some reverse osmosis systems require pre-filter replacement about every six months, though the exact interval depends on the unit and household water conditions. In addition to pre-filters, RO systems may also require post-filters and membrane replacement at different intervals. Treating the whole system as a maintenance plan, rather than a single cartridge swap, will help it perform more reliably.
How often should you replace your water filter?
The honest answer is that there is no universal schedule. Some pitcher filters are designed for a fixed number of gallons, some faucet filters use digital indicators, and some under-sink systems depend on both calendar time and water quality. This is why guessing based on taste, appearance, or habit can be misleading. A filter may taste fine beyond its certified capacity, but that does not mean it is still reducing contaminants as promised.
Many homeowners like a simple rule such as every two months or every six months, but that only works if it matches the product instructions. Brita’s published guidance, for example, shows that some filters are certified only up to a set capacity, with performance not certified after 40 gallons for certain models. That kind of detail matters because it illustrates how product-specific these limits can be. Capacity-based replacement is common, particularly for smaller point-of-use filters.
If your home uses a reverse osmosis system, the timeline is often layered. Pre-filters may need more frequent replacement because they protect the membrane from sediment and chlorine exposure. The membrane itself usually lasts longer, but not indefinitely. If pre-filters are neglected, the membrane can wear out sooner, which increases waste and replacement cost.
A practical approach is to create a small maintenance record. Write the installation date on the cartridge if the brand allows it, note the expected replacement date in your phone calendar, and reset any indicator after installation. This removes guesswork and reduces the chances that a busy season of life will push the task off for months longer than intended.
Common signs a filter may need attention
Even though you should not rely on symptoms alone, they can still be useful cues. A slower flow rate, unusual taste, unusual odor, noise in the system, or an indicator light turning on may all suggest it is time to replace the cartridge or inspect the unit. In an under-sink or refrigerator setup, visible leaks or drips around the housing also deserve immediate attention. Those issues may be related to a worn seal, a misaligned cartridge, or a housing that was not tightened properly after the last change.
What matters is how you interpret these signs. Think of them as prompts to check the manufacturer schedule and inspect the system, not as permission to keep delaying maintenance until the water becomes obviously unpleasant. Many contaminants are not detectable by taste or smell, and some filters gradually lose performance in ways that are not obvious to a homeowner standing at the sink.
Tools and supplies to gather first
Before you begin, set yourself up so the process feels easy rather than improvised. Most filter changes require very few tools, but having everything within reach helps you work carefully and keep the area clean. It also reduces the chance that you will leave the old cartridge sitting in place while you go searching for a towel or trying to remember the reset sequence for the indicator light.
For basic household filter replacement, you will usually want the correct new cartridge, clean hands, a towel or cloth, a bowl or tray for drips, and the manufacturer instructions on your phone or in print. For under-sink or reverse osmosis systems, it can be useful to have a small bucket, food-safe lubricant if the manual specifically recommends it for O-rings, and perhaps a housing wrench if your system uses one. Avoid using random household grease or petroleum-based products on seals unless the manufacturer explicitly permits it.
If this is your first time replacing a filter, take one clear photo before you remove anything. A quick picture of how the cartridge sits, how the housing is oriented, or where the shutoff valves are can make reassembly much more confident. It is a small habit, but it turns maintenance into a calmer process, especially if your system has more than one canister.
Step-by-step: how to replace your water filter
The exact method depends on your filter type, but the core process is consistent. You confirm the correct cartridge, prepare the area, shut off pressure if needed, remove the old filter, inspect the seals, install the new filter correctly, flush the system, and reset the indicator. Moving in this sequence reduces mistakes and gives you a chance to catch simple problems before they become leaks or performance issues.
Step 1: Confirm the exact replacement cartridge
Start by checking the model number carefully. Matching the brand is not always enough because a single manufacturer may have several similar-looking cartridges with different certifications, dimensions, or flow characteristics. If your filter was selected to reduce a specific contaminant, double-check the certification and product claims while you are at it. This is particularly important for households concerned about lead, PFAS, or other contaminant-specific filtration needs.
Try not to substitute a vaguely compatible filter just because it is available faster or at a lower price. In some cases, off-brand replacements work mechanically, but may not offer the same certified reduction claims or fit tolerances. When the goal is dependable water quality and sustainable long-term use, consistency matters more than convenience in this step.
Step 2: Wash your hands and prepare the area
This sounds obvious, but it is a meaningful part of good maintenance. Clean hands help prevent introducing dirt, oils, or residue onto the new cartridge, especially on the end that interfaces with seals or drinking water pathways. Lay a towel under the work area and place a bowl or tray nearby to catch drips. If you are working under a sink, remove any stored items that might get in the way.
Give yourself enough light to see what you are doing. Under-sink cabinets in particular tend to be dim, and poor visibility can lead to cross-threading, partial seating, or missed leaks. A small flashlight or phone light is often enough to make the whole job feel more controlled.
Step 3: Shut off water pressure if your system requires it
Pitcher filters and many countertop units do not require this step, but faucet-mounted, refrigerator, under-sink, and reverse osmosis systems often do. Follow the manufacturer’s instructions for shutting off the feed water or isolating the filter. In some systems, you may also need to relieve pressure by opening the dedicated faucet after the supply is turned off. This helps prevent sudden spurts of water when the housing is opened.
If your filter housing is difficult to loosen, resist the temptation to force it aggressively. Pressure inside the system may still be present. Pausing to confirm that the water is fully shut off is safer and usually saves time.
Step 4: Remove the old filter carefully
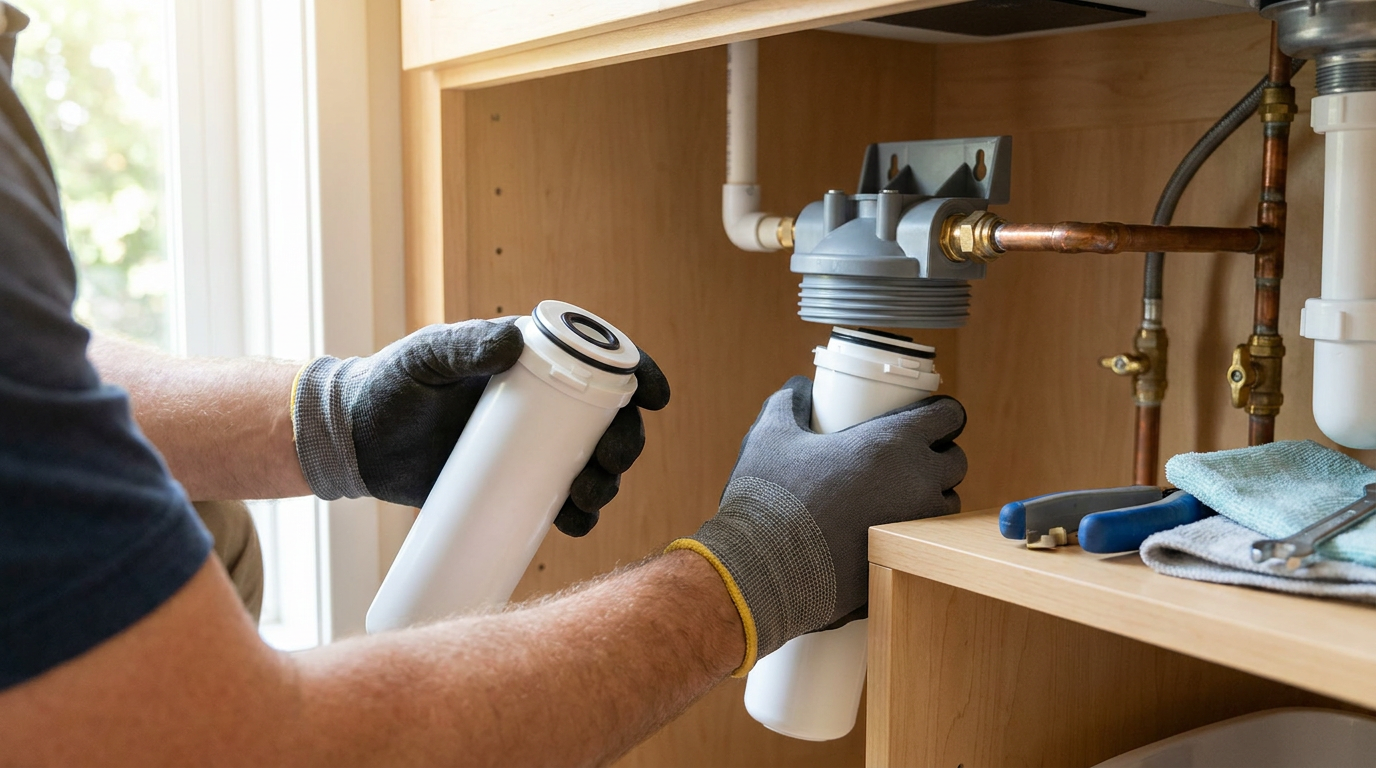
The removal method will depend on the design. Some cartridges twist a quarter turn and pull out, while others lift straight up or sit inside a canister housing that unscrews. Keep the old cartridge upright as much as possible because it may hold more water than you expect. Place it in your tray or sink as soon as it comes free.
Take a moment to inspect the inside of the housing or cartridge seat. If there is visible sediment, slime, or mineral buildup, clean it according to the manufacturer’s instructions before installing the new filter. Do not use harsh cleaners unless the product manual says they are appropriate. A clean cloth and mild washing, where allowed, are often enough.
Step 5: Inspect O-rings, gaskets, and seals
This step is often overlooked, yet it is one of the best ways to prevent leaks. Check any visible O-rings or seals for cracks, flattening, twisting, or debris. If an O-ring came out with the old cartridge, make sure it is not stuck to the wrong part or doubled up accidentally. A misplaced seal is a common reason a perfectly good filter starts dripping after installation.
If your manufacturer recommends lubricating O-rings, use only the specified food-safe product and apply it lightly. Too much lubricant can attract debris and make parts harder to seat properly. If a seal looks damaged, replace it before continuing. It is better to delay the job briefly than to reinstall a system with a worn sealing surface.
Step 6: Install the new filter in the correct orientation
New cartridges usually have arrows, tabs, alignment marks, or keyed fittings that show the correct orientation. Follow them carefully and avoid forcing the part into place. A filter that is only partially seated may still allow water to flow, but it can reduce performance or create leaks around the connection point. Slow, deliberate installation is more reliable than trying to tighten everything as quickly as possible.
If your system uses a canister housing, tighten it firmly but do not overtighten beyond the instructions. Over-tightening can damage threads, compress seals unevenly, or make the next replacement unnecessarily difficult. The goal is a secure fit, not maximum force.
Step 7: Restore water and check for leaks
Once the new cartridge is installed, turn the water supply back on gradually if your system uses shutoff valves. Watch the housing, fittings, and surrounding area closely for drips or seepage. In some systems, a tiny air release or brief sputtering is normal at first as trapped air clears. What is not normal is a steady leak, a loose housing, or water collecting around the seals.
If you do notice leakage, shut the water back off and recheck the seating of the cartridge and condition of the O-rings. Often the fix is simple, such as realigning the cartridge or tightening a housing to the recommended level. Taking a few extra minutes here can prevent cabinet damage and water waste later.
Step 8: Flush the system exactly as directed
This is one of the most important steps in the whole process. Many new filters need to be flushed to remove carbon fines, trapped air, or manufacturing residue before normal use. If you skip flushing, you may notice black specks, cloudy water, odd taste, or reduced flow. More importantly, the system may not perform as intended right away.
Flush times vary significantly by product. Some pitcher filters require soaking before use, some faucet or refrigerator filters need a specific number of gallons run through, and some under-sink systems need several minutes of continuous flushing. Always follow the instructions for your exact model rather than relying on memory from a different filter you used in the past.
Step 9: Reset the indicator and record the date
After flushing, reset any filter indicator light, timer, or gallon counter so the next replacement alert remains accurate. Then note the installation date in whatever format works best for you. A phone reminder, a home maintenance app, or even a small label inside the sink cabinet can all work well. The goal is simply to make the next change easy to anticipate.
This step may feel administrative, but it is one of the habits that keeps maintenance sustainable. When replacement dates are visible and predictable, you are less likely to delay too long or replace cartridges prematurely. That means better water quality, better system efficiency, and less unnecessary waste.
Filter-specific notes for common home systems
Pitcher filters
Pitcher filters are often the simplest to replace, but they still deserve careful handling. Many require a rinse or soak before the first use, and some use tight-fitting reservoirs that need the cartridge fully pressed into place to avoid bypass. If your pitcher has an electronic indicator in the lid, remember that it usually tracks time or usage estimates rather than directly measuring filter performance. Keep following the product schedule even if the filtered water still tastes normal.
Because pitcher filters are so accessible, people sometimes stock up and leave cartridges in storage for a long time. That is generally fine when packaging is intact, but check the package and manufacturer guidance for storage conditions. Keep replacements dry, clean, and away from household chemicals.
Faucet-mounted filters
Faucet filters are convenient because they offer filtration on demand, but they can be sensitive to correct cartridge seating. If the unit leaks at the connection point after replacement, the issue may be the faucet adapter rather than the cartridge itself. Make sure all gaskets are present and clean. After installation, switch between filtered and unfiltered modes a few times to confirm that the mechanism is working smoothly.
Some faucet filters include electronic indicators that estimate remaining capacity. These are helpful, but the replacement cartridge still needs to match the exact model. Similar-looking cartridges from the same brand may not be interchangeable.
Refrigerator water filters
Refrigerator filters are common and usually quite user-friendly, but they can require a substantial flush after installation. Many manufacturers recommend running multiple gallons through the dispenser and discarding the first batches of ice. This can feel wasteful, though it is part of proper setup. If you want to reduce waste, collect the flush water for watering non-edible plants where appropriate, cleaning, or other household uses, provided the manufacturer does not advise otherwise.
If your refrigerator has a hard-to-open filter compartment, avoid prying aggressively with metal tools that could damage the housing. Consult the manual for the release sequence. A filter that is not fully locked in place may cause slow dispensing or leakage inside the appliance.
Under-sink carbon systems
Under-sink filters often provide a nice balance of performance and convenience, but they require slightly more attention during replacement because leaks may go unnoticed at first. After installing the new cartridge and restoring water, check the area several times over the next day. Run the faucet, then inspect the fittings again once pressure has stabilized. A dry paper towel passed around each connection can reveal small drips more clearly than your eyes alone.
If the system uses multiple stages, replace each cartridge according to its own schedule rather than changing only the one that seems easiest. Multi-stage systems are designed so each stage supports the others. Skipping one stage can reduce overall effectiveness.
Reverse osmosis systems
Reverse osmosis systems are more involved because they often include pre-filters, post-filters, and a membrane. EPA notes that some RO systems need pre-filter replacement about every six months, but actual intervals vary by unit and water conditions. That variation matters because RO performance depends heavily on how well the earlier stages protect the membrane. If sediment or chlorine reaches the membrane more than intended, the system may lose efficiency sooner.
When replacing RO components, follow the sequence in the manual and do not assume that all stages should be changed at the same time. Some do, some do not. If you are uncertain about membrane condition or total dissolved solids performance, consult the manufacturer or a qualified water treatment professional rather than guessing.
Common mistakes to avoid
The most common mistake is simply waiting too long. It is understandable because filters are out of sight in many homes, and water that tastes acceptable can create a false sense of security. But EPA guidance is very clear that home water treatment systems require maintenance, and neglected systems can become less effective or even worsen water quality. Timely replacement is part of safe operation.
Another frequent issue is skipping the flush step. People often install a new cartridge, run a quick glass of water, and assume the job is finished. In reality, flushing is often essential for proper taste, flow, and performance. A third mistake is failing to inspect O-rings and seals. Many post-installation leaks come not from the filter itself, but from a twisted, dirty, or worn gasket.
There is also a sustainability mistake that happens at the purchasing stage. Some households buy a filter without first matching it to the contaminants they want to reduce. All filters do not remove the same things. Media type and certification determine what a filter can reduce, so it makes sense to choose products based on local water concerns rather than generalized marketing claims.
Responsible disposal and recycling of old water filters
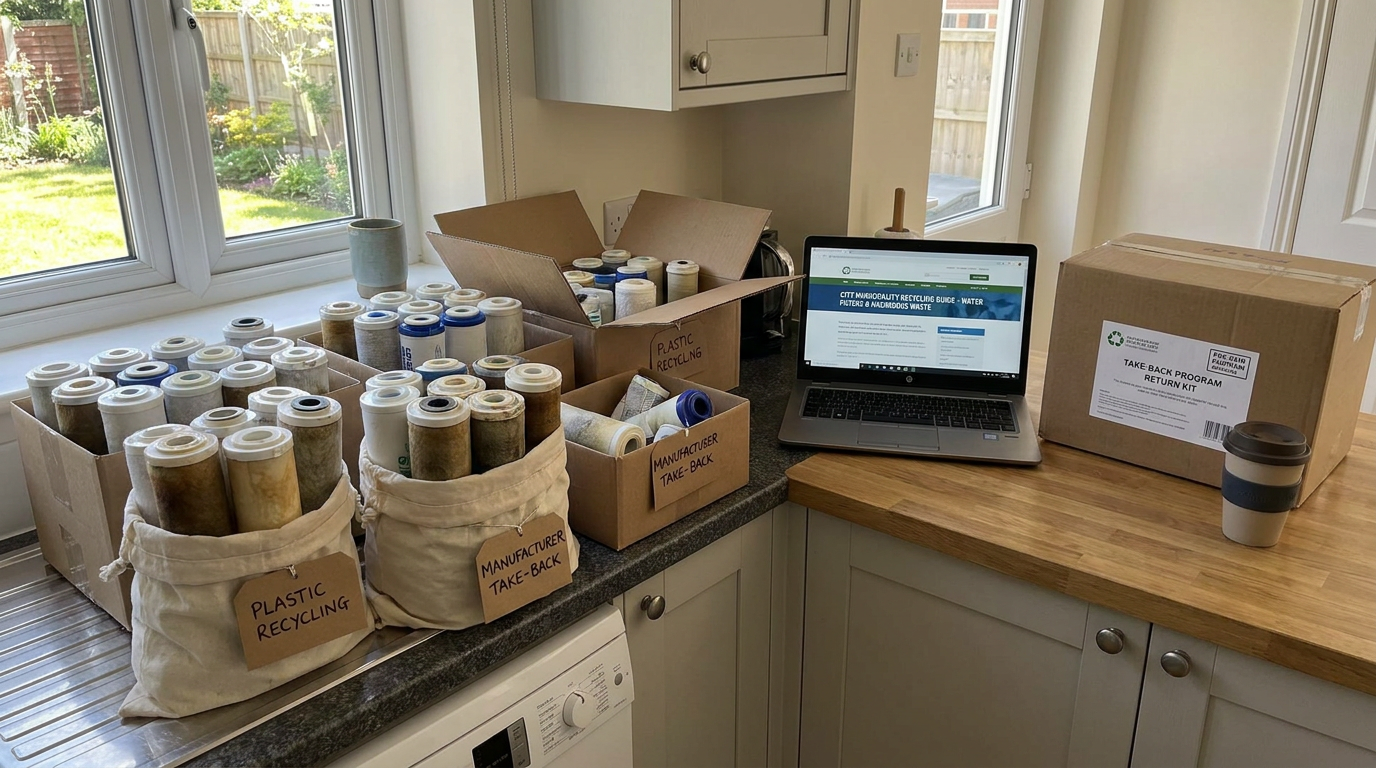
If you care about eco-friendly living, what happens after the filter comes out matters almost as much as the replacement itself. It is tempting to assume every old cartridge belongs in curbside recycling, but that is often not the case. EPA recommends checking local rules because used filter cartridges may be handled differently by municipalities, and some communities direct residents to household hazardous waste programs, special waste drop-offs, or retailer take-back options instead.
This variation exists because cartridges are often made from mixed materials and may contain captured contaminants. That makes them difficult for standard curbside systems to process. Before tossing an old filter into the recycling bin, check your municipal website or waste collection guide. A few minutes of research helps prevent contamination in the recycling stream and supports more responsible materials handling.
Manufacturer take-back and recycling programs are worth seeking out. More brands now offer mail-back options or partnerships with retail collection programs in North America. These systems are not available everywhere, but when they are, they can be a better end-of-life path than ordinary disposal. If your brand offers a program, keep the packaging or note the instructions before your next replacement date.
Practical disposal checklist
- Check the filter brand’s website for mail-back, recycling, or take-back options.
- Look up your local municipality’s rules for water filters, cartridges, and household special waste.
- Drain excess water from the used filter as directed before storing it for drop-off or mailing.
- Keep old cartridges in a bag or container if needed to prevent drips indoors.
- Do not assume curbside recycling accepts mixed-material cartridges unless your local program says so.
Responsible disposal may not feel dramatic, but it reflects the larger idea behind sustainable maintenance. The goal is not perfection. The goal is making the next practical choice well. Replacing filters on time, keeping systems working longer, and directing old parts to the best available disposal route are all meaningful steps.
How filter maintenance supports a lower-impact home
Home sustainability is often framed around major upgrades like heat pumps, insulation, or solar panels. Those improvements matter, but smaller maintenance habits deserve more credit than they usually receive. A water filter that is maintained correctly supports the continued use of refillable bottles, pitchers, and everyday tap water systems. That can reduce reliance on single-use plastic bottles and help households feel more confident using the infrastructure they already have.
Maintenance also extends the useful life of the equipment itself. A neglected filter can make a system seem ineffective long before the system actually needs replacement. By contrast, a cartridge changed on schedule, with seals inspected and flush steps completed, helps the housing, fittings, faucets, and membranes operate as designed. That is a quieter form of sustainability, but an important one. It is about protecting value and reducing unnecessary replacement.
There is also a mindset benefit. Practical maintenance gives people more direct control over the environmental footprint of daily life. You do not need a major renovation to make a thoughtful improvement. Sometimes it starts with understanding one task well and doing it with consistency.
When to test your water or seek professional help
Replacing a filter is a good maintenance practice, but it does not replace the need to understand your water source. If you are filtering for a specific concern, especially well water contaminants, lead in older plumbing, or PFAS-related concerns, it may be worth testing your water and confirming that your filtration strategy matches the issue you are trying to address. EPA recommends selecting certified products based on the specific contaminant you want to reduce, and that logic starts with knowing what is in your water.
If you notice repeated leaks, unusual pressure drops, persistent taste issues after proper flushing, or uncertainty about multi-stage replacement in a reverse osmosis system, calling a qualified professional can be sensible. There is nothing unsustainable about getting expert help when it prevents damage, wasted parts, or incorrect installation. Thoughtful maintenance includes knowing when a task is within your comfort zone and when it is better to bring in support.
A simple maintenance rhythm to keep going
If you want this process to stay easy, create a repeatable routine around it. Store the correct replacement cartridge where you can find it, save the manufacturer instructions in a bookmarks folder, and set calendar reminders based on your actual model’s schedule. If you have multiple filters in the home, such as a refrigerator filter and an under-sink system, keep a small note that lists each one and its typical replacement interval. Clarity reduces waste because it helps you replace each part when it should be replaced, not too early and not too late.
It can also help to pair filter replacement with another seasonal home task. Some people do it when clocks change, while others tie it to utility bill reviews or pantry resets. The exact system does not matter much. What matters is creating a rhythm that is easy to remember and realistic for your household.
Final thoughts
Replacing your water filter is a modest task, but it sits at the intersection of health, home performance, and sustainability in a meaningful way. EPA guidance makes clear that home water treatment systems need ongoing maintenance, and that replacement should follow the manufacturer’s schedule. When you treat that advice as part of everyday home care, the process becomes much less intimidating. It becomes a practical routine that supports cleaner water and more efficient use of the system you already have.
The most sustainable approach is rarely the most dramatic one. More often, it is a series of calm, well-informed decisions: choosing the right cartridge, installing it correctly, flushing it as directed, recording the date, and disposing of the old filter responsibly. Those steps are simple, but together they create a home that works better and wastes less.
If you have been putting off your next filter change, consider this your invitation to make it easy. Find your model number, check the schedule, and take the process one step at a time. A well-maintained water filter is not just a household accessory. It is a small, tangible way to care for your home with purpose and confidence.



No Comment! Be the first one.