



Create Your Cozy Outdoor Fire Pit: A Step-by-Step Guide to a Safe, Inviting Backyard Retreat
There is something deeply comforting about gathering around a fire at the end of the day. The light is soft, the warmth draws people in, and even a simple evening outdoors can feel more relaxed and memorable. A backyard fire pit has a way of turning unused square footage into a place where stories are shared, marshmallows are toasted, and ordinary nights feel a little more special. When it is planned well, it becomes more than a feature. It becomes the heart of an outdoor room.
Table Of Content
- Why a Fire Pit Works So Well in an Outdoor Living Space
- Step 1: Start With Local Rules Before You Design Anything
- Step 2: Choose the Right Type of Fire Pit for Your Lifestyle
- Wood-Burning Fire Pits
- Propane and Natural Gas Fire Features
- A Critical Safety Note on Liquid and Gel Fuels
- Step 3: Pick the Best Location in Your Yard
- Step 4: Design the Space as an Outdoor Room
- Step 5: Build a Safe, Noncombustible Base
- A Simple Step-by-Step Construction Path
- Step 6: Plan Seating for Warmth, Conversation, and Comfort
- Step 7: Add the Finishing Elements That Make It Feel Cozy
- Step 8: Make Safety Part of the Ritual
- Step 9: Understand Fire Bans, Wildfire Season, and Air Quality
- Step 10: Keep Accessibility and Multigenerational Use in Mind
- Mistakes to Avoid When Building a DIY Fire Pit
- How to Maintain the Space So It Stays Beautiful
- Bringing It All Together
What makes a fire pit especially appealing is that it blends practicality with atmosphere. It offers warmth on cool evenings, creates a natural focal point for furniture, and encourages people to linger. It can serve a quiet couple’s night just as beautifully as a multigenerational family gathering. Yet the most successful fire pit areas are never just about looks. They are shaped by safety, local regulations, comfort, and the way people actually move through and use a backyard.
This guide is designed to help you create a personal outdoor oasis that feels warm, welcoming, and thoughtfully put together. We will walk through how to choose a fire feature, how to confirm local rules, how to prepare a safe base, and how to style the surrounding space so it feels complete. Along the way, we will also talk about practical realities that matter in Canada and across North America, including municipal bylaws, seasonal fire bans, wildfire awareness, and the importance of building with accessibility in mind.
If you have been dreaming about cozy evenings under the stars, this is where to start. A beautiful fire pit is absolutely possible as a DIY project, but the smartest version of that project begins with planning. When you understand what kind of fire feature fits your lifestyle and how to build around it responsibly, you create a backyard retreat that feels good to use year after year.
Why a Fire Pit Works So Well in an Outdoor Living Space
A fire pit naturally gives shape to an outdoor area because it creates an obvious center. Even in a large yard, it helps a space feel intentional. Instead of scattering chairs without purpose, you can build an arrangement around warmth and conversation. This is why so many well-loved patios use the fire pit as the anchor that connects hardscaping, seating, lighting, and landscaping into one cohesive environment.
From a lifestyle perspective, the beauty of a fire pit is that it extends the usability of your yard. Spaces that might only be pleasant on hot summer afternoons suddenly become inviting in early spring, late fall, and cooler summer evenings. The result is not just a prettier backyard but a more flexible one. You are creating a place for morning coffee on brisk days, casual entertaining, and moments of calm after dinner.
There is also an emotional quality to a fire pit that other backyard features often lack. Firelight is flattering, grounding, and naturally intimate. It softens the edges of a space and encourages people to slow down. For homeowners who care about comfort and atmosphere, that matters just as much as the physical structure itself.
A great fire pit area should feel like an outdoor room, not a lonely object in the yard. When you plan for circulation, seating, lighting, and safe surfaces from the beginning, the result feels complete and genuinely livable.
Step 1: Start With Local Rules Before You Design Anything
Before you sketch a layout, buy materials, or decide on fuel type, begin with the question that matters most: Is a fire pit allowed where you live, and under what conditions? This is not the glamorous part of the process, but it is the foundation of a responsible project. Across Canada and North America, legality varies by municipality, neighborhood rules, homeowners’ associations, and seasonal wildfire restrictions. A fire pit that is acceptable in one town may be restricted or prohibited in another.
Municipal bylaws often address the size of a fire pit, the kind of fuel you can use, setback distances from structures or property lines, and whether a permit is required. In some regions, small recreational fires are allowed only under very specific conditions. In others, portable appliances powered by propane may be treated differently from wood-burning features. This is why broad online advice should never be your only source. Your local fire department, municipality, or official bylaw office will usually have the clearest guidance.
Seasonal and emergency restrictions matter too. Parks Canada and many local authorities use fire bans to protect visitors, nearby residents, and infrastructure during higher-risk periods. That means a legal fire pit can still become unusable during drought, high winds, or wildfire season. Responsible homeowners do not see this as an inconvenience. They see it as part of living well and safely with an outdoor fire feature.
As you research, write down answers to a few simple questions. Are wood fires allowed at home? Are propane or natural gas units treated differently? Is a permit needed for permanent installation? Are there distance requirements from fences, decks, roofs, or vegetation? Are there days or weather conditions when burning is restricted? Once you know these details, the rest of your decisions become much easier and much more confident.
Step 2: Choose the Right Type of Fire Pit for Your Lifestyle
Once you know what is legal, the next step is choosing a fire feature that fits the way you want to live outdoors. For many people, the decision comes down to wood-burning versus propane or natural gas. Both can be beautiful, but they offer very different experiences. The right answer depends on the kind of evenings you imagine, the amount of maintenance you are comfortable with, and the restrictions in your area.
Wood-Burning Fire Pits
Wood-burning fire pits are often what people picture first. They offer crackling sound, the scent of burning wood, and the classic campfire feeling that many families love. For people who want sensory warmth and a more traditional outdoor experience, wood has a lot of charm. It is especially appealing for social gatherings where tending the fire becomes part of the ritual.
That said, wood-burning pits require more effort. You need dry fuel, safe ash disposal, spark awareness, and more active supervision. Smoke can also be an issue, especially in compact neighborhoods or during periods of poor air quality. If wildfire season or smoke sensitivity is a concern in your area, a wood-burning feature may not always be the most practical choice.
Propane and Natural Gas Fire Features
Gas fire pits continue to grow in popularity because they are easy to ignite, easier to control, and generally cleaner in daily use. They are ideal for homeowners who want convenience and a polished outdoor entertaining experience. If your goal is to step outside, turn on the flame, and enjoy an instant sense of comfort without storing firewood or managing ashes, gas has real advantages.
Natural gas can be especially convenient in a permanent setup, while propane offers flexibility in many portable or semi-permanent models. Still, convenience does not mean zero responsibility. Installation may need to meet code, gas lines should be handled correctly, and all manufacturer instructions should be followed carefully. Local rules may also distinguish between a built-in gas fire feature and a movable unit.
A Critical Safety Note on Liquid and Gel Fuels
One important misconception deserves special attention. Some people assume small tabletop fireplaces or decorative firepots that use liquid or gel fuels are automatically safer than larger wood-burning pits. Health Canada has warned that portable fireplaces and firepots using liquid or gel fuels can create a dangerous flame-jetting effect, especially if fuel is added to a hot or lit reservoir. These incidents have caused severe injuries and deaths in Canada.
If you are considering a portable decorative flame feature, treat it with the same seriousness you would any other fire source. Never refill fuel while a unit is hot or lit, and do not assume that compact size means low risk. For many homeowners, a properly installed propane unit or a carefully built wood-burning fire pit will feel like the safer, more practical long-term choice.
Step 3: Pick the Best Location in Your Yard
Placement has a huge impact on both safety and comfort. A fire pit may look lovely tucked near a fence or beneath a pergola in a photograph, but real-life use requires clear thinking about heat, sparks, circulation, and overhead hazards. A beautiful fire pit area starts with the right distance from combustible structures and enough open space around the flame source.
Choose a location with room to breathe. You want generous separation from your home, garage, shed, fences, overhanging tree branches, play equipment, and anything made of combustible material. You also want to think about how people will walk to and around the fire pit. If guests have to squeeze past chairs or step too near the flame to move through the space, the layout will never feel fully comfortable.
Wind patterns are worth noticing too. A backyard may seem still at one hour and noticeably breezy at another. Watch how air moves across your space before finalizing the location. If the area catches gusts, smoke may drift toward seating, sparks may become more of a concern, and the fire itself may be harder to manage. A slightly more sheltered spot, paired with thoughtful landscaping or wind protection, can make the experience dramatically better.
Also think beyond the fire pit itself. A truly enjoyable setup includes nearby surfaces for setting down drinks, a place to store blankets, and a path back to the house that feels safe after dark. The best location will support all of these small moments, not just the fire.
Step 4: Design the Space as an Outdoor Room
One of the smartest ways to approach a DIY fire pit is to think of it as part of a full outdoor room. This mindset instantly improves the result because it encourages you to plan for comfort, proportion, and use. Instead of asking only where the fire will go, ask how people will arrive, where they will sit, where they will set things down, and how the space will feel after sunset.
Start with the center point, then create a ring of comfortable seating at a distance that feels warm without being too hot. Chairs that sit too close can make guests feel tense and overheated, while chairs that sit too far away weaken the intimacy that makes fire pits special. Try to imagine real conversations taking place there. People should be able to see one another easily and move in and out of their seats without awkwardness.
Traffic flow matters more than many DIY builders expect. Leave enough open space so people can walk behind chairs, approach the area carrying trays or drinks, and navigate safely even when the light is low. If you have older family members, young children, or guests with mobility needs, these clearances become even more important. Accessibility Standards Canada’s outdoor-space guidance includes fire pits and cooking facilities, emphasizing clear space around usable sides and contrasting surfaces for visibility. That is a thoughtful principle for any home, not just public spaces.
Surface contrast can quietly make an area easier to navigate. A fire pit built on a patio with subtly different textures or tones around the perimeter can help define the edge of the feature and the circulation zone around it. Stable, even surfaces are also more welcoming for wheelchairs, walkers, and strollers. When comfort is the goal, ease of movement should always be part of the design language.
Step 5: Build a Safe, Noncombustible Base
The surface beneath and around a fire pit is not just a visual decision. It is one of the most important safety elements in the entire project. A well-designed fire pit area should sit on a noncombustible base, which helps reduce risk from stray embers, radiant heat, and regular wear. It also gives the area a grounded, finished appearance that makes your backyard feel more intentional.
Stone pavers, gravel, concrete, and other hardscaping materials are common choices. The best option for your yard depends on your style, your budget, and whether the fire pit will be portable, semi-permanent, or fully built in. Whatever you choose, the goal is the same: create a stable, level, durable surface that can handle heat and foot traffic gracefully.
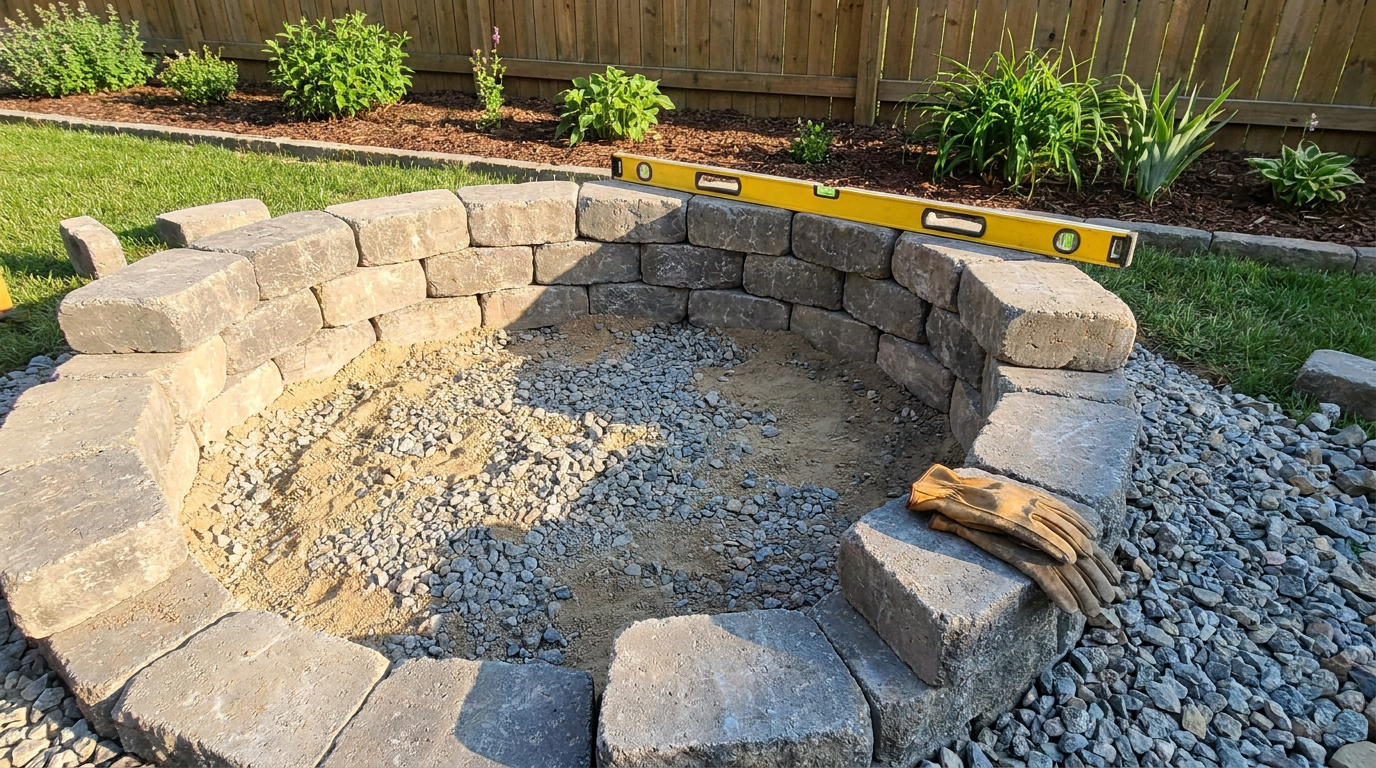
If you are building a simple DIY masonry fire pit, the general process often includes marking the footprint, excavating the area, laying and compacting a gravel or paver base, checking for level, and then assembling fire-rated blocks or rings according to manufacturer directions. Some projects also use landscape adhesive or fire-safe inserts, depending on the design. It is important to use materials intended for this type of application rather than improvising with random stone or concrete that may not handle heat properly.
For readers who want a cleaner and less technical route, placing a high-quality portable fire pit on a prepared noncombustible patio area can be a very practical choice. You still gain the comfort and focal point of the fire feature while keeping the build process more manageable. This can be especially appealing if you are still testing the best location or if local bylaws favor portable units.
A Simple Step-by-Step Construction Path
- Confirm local rules, setbacks, and any permit requirements before buying materials.
- Choose your fire pit type and verify the manufacturer’s installation and clearance instructions.
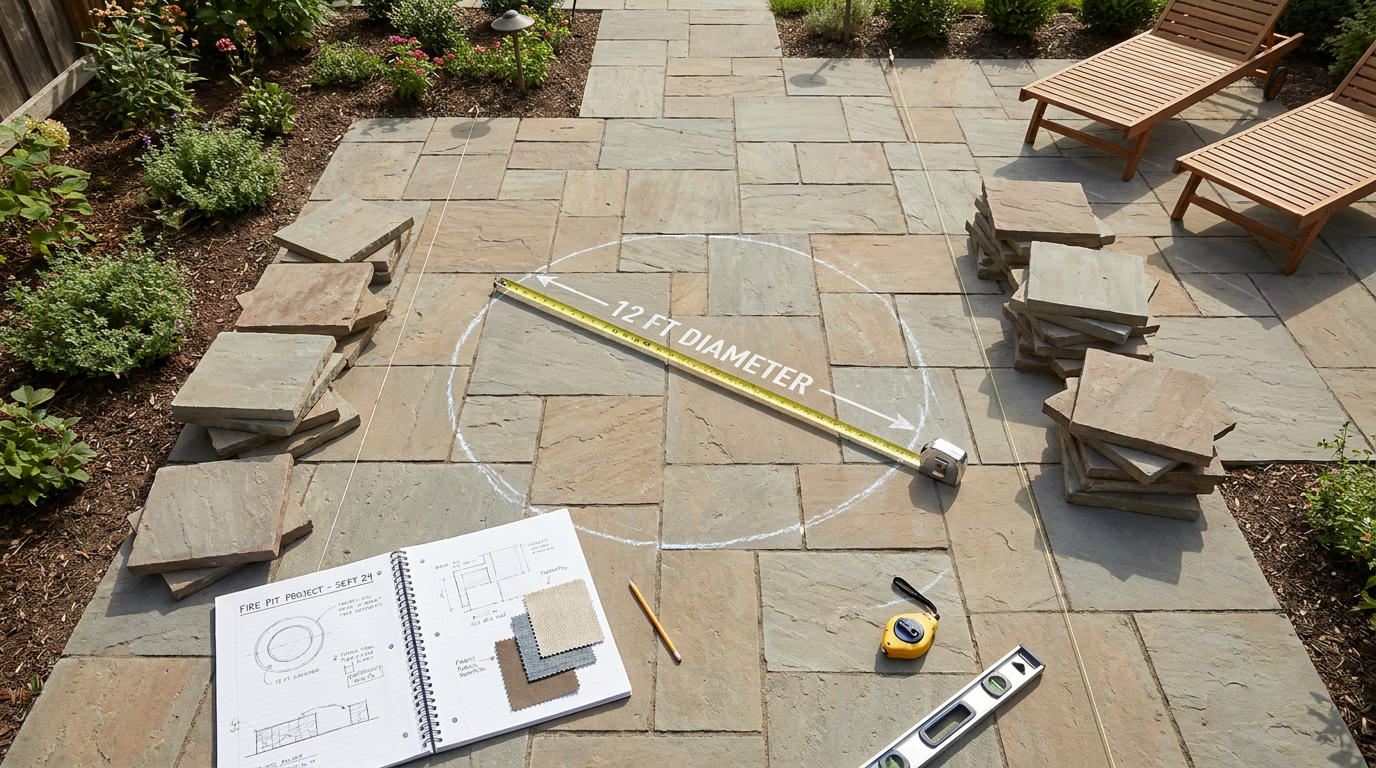
- Mark the fire pit footprint and the larger seating zone so you can assess scale in the yard.
- Excavate and prepare a level base using suitable hardscaping materials such as compacted gravel or a paver base.
- Install noncombustible surfacing around the fire pit so sparks and foot traffic are better managed.
- Assemble the pit or place the unit according to approved instructions, then double-check stability and clearances.
- Test the space with seating before final styling so you can adjust circulation and comfort.
Even though this is a lifestyle-centered guide, this part of the process deserves care and patience. A strong base affects how the entire space looks, feels, and performs over time. It is what turns a fire pit from a temporary object into a dependable part of your home.
Step 6: Plan Seating for Warmth, Conversation, and Comfort
Once the fire pit is in place, seating is what gives the area its personality. This is where a functional build becomes a true retreat. The most inviting setups balance warmth with roominess. Guests should feel close enough to enjoy the glow, but not so close that they need to keep shifting away from the heat.
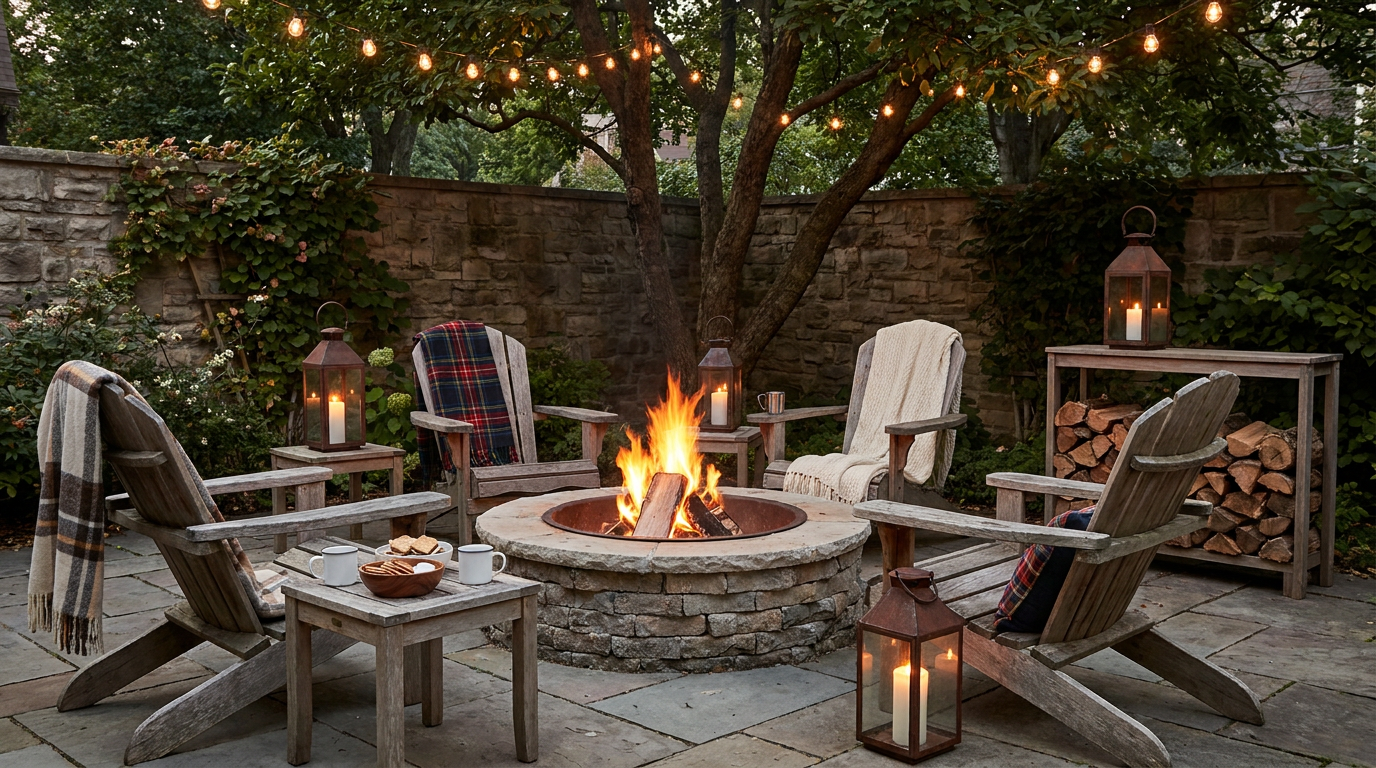
Deep outdoor lounge chairs, Adirondack chairs, weather-resistant sofas, and built-in seating walls can all work beautifully. The best choice depends on the size of your space and how formal or relaxed you want the atmosphere to feel. If your family tends to gather casually with blankets and snacks, freestanding chairs may be ideal. If you entertain often and want a polished look, built-in seating with cushions can give the area a more architectural presence.
Think about flexibility as well. Side tables or movable stools can make a big difference when guests need a place for drinks or plates. If children or older adults will use the area regularly, include a few seats with supportive backs and arms for easier sitting and standing. This simple choice can make the whole space feel more inclusive and comfortable.
Layering in softness is where the emotional warmth really comes alive. Outdoor cushions, all-weather throws, and a storage bench for blankets can make even a basic patio arrangement feel generous and welcoming. These are the details that encourage people to stay for one more conversation, one more cup of tea, one more look at the stars.
Step 7: Add the Finishing Elements That Make It Feel Cozy
The difference between a usable fire pit and a beloved one often comes down to styling. Once the safety essentials are covered, comfort details complete the experience. A little glow beyond the fire itself, a sense of enclosure, and a few practical accessories can transform the area into a true backyard destination.
Lighting should be layered rather than harsh. Soft pathway lights, lanterns, string lights, or low landscape lighting can help guests move safely while keeping the mood relaxed. The goal is not to overpower the firelight but to support it. When done well, ambient lighting makes the whole area feel calm and beautifully considered.
Wind protection is another valuable finishing touch. Depending on your layout, this might come from a fence line, a masonry wall, dense plantings, or a carefully placed screen that does not interfere with fire safety. Even a modest buffer can help the space feel warmer and more settled. It can also improve how smoke or flame behaves in breezier weather.
Storage matters more than it first appears. If you use wood, create a dry, tidy place to keep it away from the flame area. If you use propane, make sure tank storage follows safety guidance and product instructions. Keep essential tools nearby as well, including a poker for wood fires, a snug-fitting screen if appropriate, and a discreet bucket or container for cooled ashes if your setup requires it.
Step 8: Make Safety Part of the Ritual
A cozy fire pit area should never invite a false sense of security. One of the most common misconceptions is that a fire feature is safe simply because it is outdoors. In reality, safety depends on fuel type, weather, placement, supervision, and the habits you build around using it. The most beautiful setup in the world still needs responsible routines.
Never leave a fire unattended, even for a short time. Children should not treat a fire pit as play equipment, and pets should be supervised too. Keep combustible décor, cushions not in use, and loose fabrics away from the immediate flame zone. If your setup uses a spark screen, remember that it reduces some risk but does not replace attention and common sense.
For wood-burning fires, use dry, appropriate fuel rather than scrap materials or debris. Manage embers carefully and extinguish the fire fully before heading indoors. Ashes should be cooled completely before disposal, ideally in a proper metal container if recommended locally. For gas units, inspect connections regularly, follow the product manual, and shut everything down properly after each use.
It is wise to keep simple extinguishing tools close by. Depending on your setup and local guidance, this may include water, sand, or a suitable fire extinguisher. The point is not to create anxiety around enjoyment. It is to normalize readiness. A well-loved outdoor space feels more relaxing, not less, when everyone knows there is a safe routine in place.
Step 9: Understand Fire Bans, Wildfire Season, and Air Quality
In many parts of Canada and North America, wildfire awareness is now part of everyday outdoor planning. A homeowner may build a perfectly legal and beautiful fire pit, only to discover that seasonal restrictions affect when and how it can be used. This is increasingly normal, and it should be built into your expectations from the start.
Check for local burn bans before lighting any fire, especially during dry periods, hot weather, or windy conditions. Restrictions can change quickly and may differ even between neighboring jurisdictions. This is one reason gas fire features have become more attractive to some homeowners. In certain areas, they may remain permissible under conditions where wood-burning fires are restricted, though that still depends entirely on local rules.
Air quality is another reality to respect. During smoky wildfire periods, even if burning is technically allowed, adding more smoke to the environment may not be ideal for your family or your neighbors. If anyone in your household has asthma or respiratory sensitivity, this deserves special consideration. A cozy outdoor space should support wellness, not work against it.
One helpful mindset is to design for flexibility. If your seating area, lighting, and outdoor styling are strong enough, the space can still feel lovely on nights when the fire stays off. Candles in safe enclosed lanterns, warm drinks, layered blankets, and subtle lighting can preserve the atmosphere while you wait for safer conditions.
Step 10: Keep Accessibility and Multigenerational Use in Mind
The most inviting backyard spaces are the ones that welcome everyone comfortably. Fire pit areas often become gathering spots for grandparents, children, teens, and friends of all ages, so thoughtful design has real everyday value. Accessibility does not have to feel clinical or overly complicated. In fact, it often overlaps beautifully with good design.
Stable surfaces, clear walkways, and enough room to approach and move around seating are all practical choices that improve usability for everyone. If someone uses a walker or wheelchair, or simply appreciates a little more room and visual clarity, these details can make the space feel far more relaxed. Contrasting textures or tones in paving can also help define edges and circulation more clearly.
Comfortable seat height matters too. A mix of seating styles allows guests to choose what works best for them. Deep low loungers may feel wonderful to some and difficult to rise from for others. Including a few upright chairs with arms helps make the area more friendly across ages and mobility levels.
When you create a fire pit space with inclusion in mind, the mood changes in the best possible way. People feel considered. They settle in more easily. And because the area works better for a wide range of bodies and routines, it is more likely to become a genuinely beloved part of the home.
Mistakes to Avoid When Building a DIY Fire Pit
Some of the most expensive and stressful fire pit problems come from preventable mistakes. One is focusing only on appearance and skipping the practical planning that makes the space safe to use. Another is assuming that if a certain design looked good online, it will automatically work in your yard. Every project needs to respond to local codes, climate, and the way your family actually lives outdoors.
- Skipping bylaw and burn-ban research before building or lighting the fire pit.
- Placing the fire pit too close to structures, fences, tree branches, or combustible décor.
- Building on grass, wood decking, or other combustible surfaces without proper protection.
- Choosing a seating layout that looks attractive but leaves poor circulation and awkward access.
- Assuming small gel-fuel or liquid-fuel fire features are low risk and handling them casually.
- Relying on a spark screen alone instead of active supervision and safe burning practices.
- Ignoring wind, smoke direction, and neighborhood proximity when choosing the location.
If you avoid these common missteps, your project is far more likely to feel successful from day one. A fire pit should add ease and pleasure to your outdoor routine, not create ongoing worry or inconvenience.
How to Maintain the Space So It Stays Beautiful
Once your fire pit is built and styled, a little regular care will keep it looking polished and functioning well. Hardscaping should be swept and checked for settling or shifting, especially after winter weather or heavy rain. If your pit uses masonry components, inspect them occasionally for cracks or wear and address any concerns before the next season of use.
Furniture should be cleaned and protected according to material. Cushions and blankets last longer when stored neatly in a weather-resistant bench or deck box. If you burn wood, keep your supply dry and off the ground where possible. If you use propane, check hoses, fittings, and storage conditions periodically based on manufacturer guidance.
Stylistically, refresh the space with the seasons. In spring, a few planters can brighten the area. In autumn, heavier throws and lantern light can make it feel richer and more cocooning. This kind of gentle seasonal update helps the fire pit remain an active, loved part of your home rather than a feature that fades into the background.
Bringing It All Together
A cozy outdoor fire pit is one of those home projects that can change the feeling of daily life in a surprisingly meaningful way. It creates a place to pause, connect, and enjoy your yard in a softer, more intentional way. But the most successful version is never just about the flame. It comes from thoughtful choices about legality, safety, comfort, circulation, and atmosphere.
If you remember only one thing, let it be this: start with the rules, then build for real life. Choose the right type of fire feature for your household, place it carefully, create a noncombustible base, and surround it with seating and details that make people want to stay. Treat the area as a complete outdoor room and make safety part of the experience, not an afterthought.
There is something wonderful about stepping outside at the end of the evening and seeing a warm little circle of light waiting for you. With the right planning, your DIY fire pit can become exactly that kind of retreat. A place for conversation, quiet, celebration, and comfort, all held together by the simple beauty of fire under the open sky.

No Comment! Be the first one.