



How to Detect Water Leaks in Your Home: A Practical, Non-Invasive Guide
Water leaks are easy to dismiss when they start small. A faint drip under a sink, an occasional toilet refill, or a slightly higher utility bill can feel more like a nuisance than a serious home maintenance issue. In reality, quiet leaks are often the ones that cost the most over time because they continue unnoticed, wasting water, stressing materials, and creating the kind of hidden moisture that leads to staining, swelling, and mold.
Table Of Content
- Why leak detection matters more than most people think
- Start with the simplest signal: your water bill
- The most reliable DIY check: the water meter test
- How to do a water meter leak test
- Test your toilets because silent leaks are extremely common
- How to do a toilet dye test
- Inspect exposed plumbing and high-risk fixtures
- Where to look first
- Do not ignore subtle warning signs in walls, floors, and ceilings
- Check appliances and utility spaces carefully
- Use simple leak alarms as a smart next step
- Best places to install leak alarms
- Are smart leak detectors necessary?
- A practical leak detection routine for every season
- A simple maintenance rhythm
- What to do if you confirm a leak
- Common misconceptions that lead people to wait too long
- Leak detection as part of a more sustainable home
- Your step-by-step leak detection checklist
- Final thoughts
The good news is that you do not need advanced DIY skills or invasive tools to catch many household leaks early. Most of the most effective methods are simple, low cost, and easy to fit into a normal maintenance routine. A careful water meter check, a toilet dye test, a visual scan of exposed plumbing, and a few well-placed leak alarms can reveal a surprising number of problems before they become expensive repairs.
This guide is designed to be practical for everyone, whether you own an older house, live in a newer condo, or rent an apartment and want to stay ahead of problems. The focus is on non-invasive leak detection, which means techniques that help you identify likely issues without opening walls, removing fixtures, or taking apart plumbing systems. If you can turn off water use for a short period, lift a toilet tank lid, and look under a sink, you can do most of what matters here.
There is also a broader reason this matters. Clean treated water takes energy and infrastructure to deliver, and once it leaks away, that effort is wasted. Environment and Climate Change Canada has reported that 13.3% of water was lost from municipal distribution systems before reaching consumers in its water-use reporting. At the household level, detecting leaks early supports the same larger goal of using resources more carefully, while also protecting your home and your budget.
Why leak detection matters more than most people think
Many homeowners assume that only large visible leaks are worth worrying about, but that is one of the most expensive misconceptions in home maintenance. According to the USGS, a constantly leaking toilet can waste about 22 gallons of water per day, which adds up to roughly 8,000 gallons in a year. A leak of one gallon every 10 minutes can waste 144 gallons per day, or more than 52,000 gallons per year. Those numbers make it clear that even a small problem can become a meaningful financial and environmental drain.
Leaks also affect more than your water bill. Water damage remains one of the costliest categories of home insurance claims, with the National Association of Home Builders citing remediation costs that average around $10,000. Even when the repair itself is simple, the aftermath can include drywall replacement, flooring damage, cabinet swelling, mildew odor, and time spent coordinating restoration work. Early detection is often what separates a minor maintenance fix from a disruptive home project.
There is also the issue of indoor air quality. Persistent moisture in enclosed spaces such as vanity cabinets, behind washing machines, or near water heaters can encourage mold growth long before a puddle appears in the open. In that sense, leak detection is not only about conservation and cost. It is also part of maintaining a healthier, more durable home.
A practical mindset helps: most household leaks start quietly, not dramatically. The goal is not to become alarmed by every drip or sound, but to create a calm, repeatable process for checking the places where leaks commonly begin.
Start with the simplest signal: your water bill
One of the easiest ways to notice a possible leak is to compare your recent water bills. EPA WaterSense notes that a significantly higher bill can be a sign of an unidentified leak. This does not mean every increase points to a plumbing problem because seasonal outdoor watering, guests, or schedule changes can also affect usage. Still, a bill that rises without a clear explanation is one of the strongest prompts to investigate.
Take a few minutes to look at the last several billing periods and ask a few basic questions. Has your household water use changed in any obvious way. Were there extra laundry loads, irrigation changes, or visiting family members. If the answer is no and your bill still climbed, it is worth moving on to a more direct test.
This first step matters because it creates a baseline. Once you know what typical use looks like in your home, you can spot unusual patterns earlier. For people who prefer a low-effort approach to maintenance, simply glancing at usage trends every month can be one of the most effective habits you build.
The most reliable DIY check: the water meter test
If you want one practical test that gives you the clearest signal without touching any plumbing, start with your water meter. EPA WaterSense recommends checking the meter before and after a two-hour period when no water is being used in the home. If the reading changes, a leak is likely somewhere in the system after the meter.
This method is especially helpful because it works even when the leak is not visible. Silent toilet leaks, slow drips in hidden fixture connections, and small ongoing line leaks may not leave obvious clues right away, but they still register on the meter. In that way, the meter functions as a whole-home screening tool.
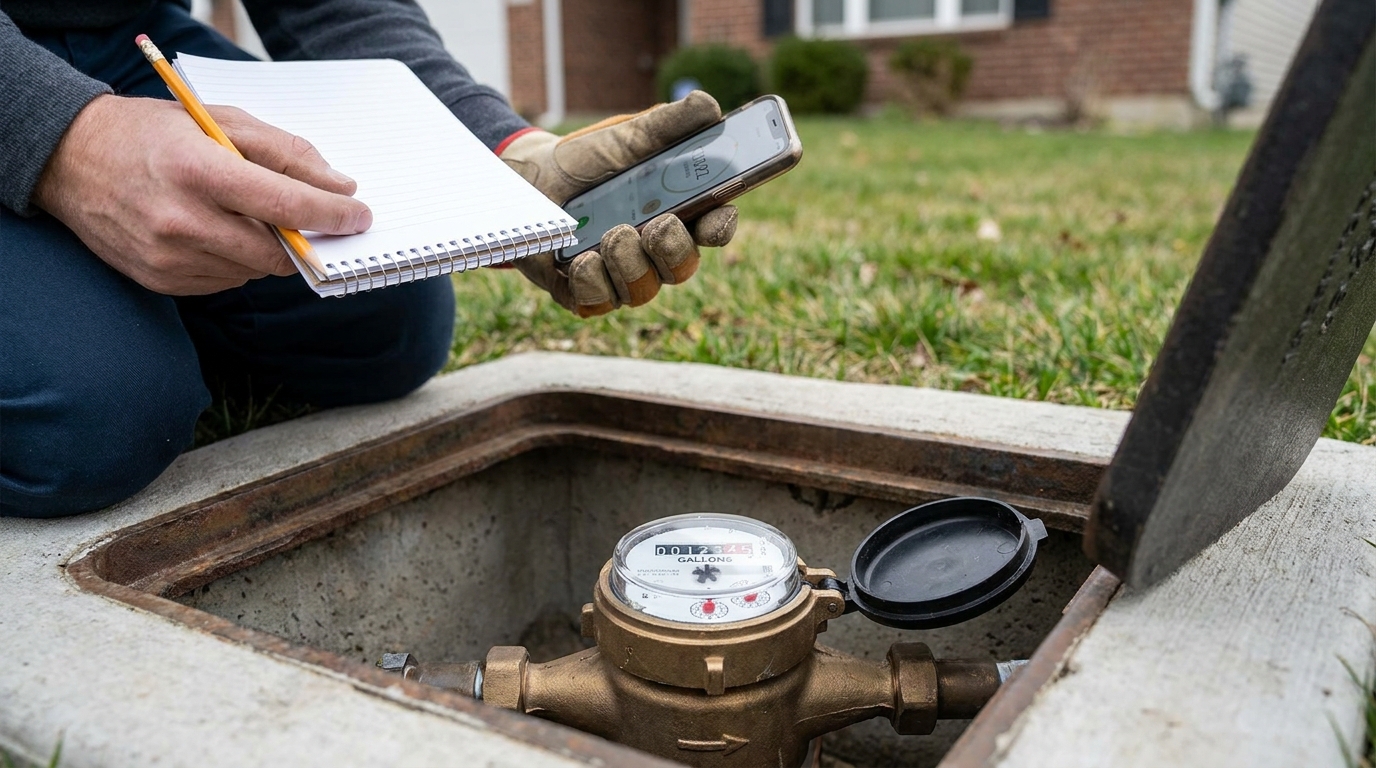
How to do a water meter leak test
Choose a time when the home can stay completely still from a water-use standpoint. Early morning or late evening often works best because dishwashers, washing machines, showers, and irrigation systems are less likely to run. Make sure no one uses a sink, toilet, appliance, or outdoor hose during the test window.
-
Locate your water meter and take a clear photo or write down the reading carefully.
-
Confirm that all water use inside and outside the home is fully off, including ice makers, irrigation, and any programmed appliance cycles.
-
Wait at least two hours without using water.
-
Check the meter again and compare the reading.
-
If the reading has changed, there is a strong chance you have a leak somewhere after the meter.
Some meters include a small leak indicator or low-flow dial that moves even when water use is minimal. If your meter has one, it can make the test even easier because subtle movement may show up quickly. If you are unsure how to interpret your specific meter, your utility provider may have a guide on its website or customer support line.
If the meter changes, do not panic. A positive meter test does not tell you exactly where the leak is, only that it likely exists. The next steps help narrow down the source using simple room-by-room checks.
Test your toilets because silent leaks are extremely common
Toilets are one of the most common sources of hidden water waste in a home, and many of these leaks are almost impossible to notice without testing. A toilet does not need to audibly run all day to be leaking. In many cases, water slips slowly from the tank into the bowl through a worn flapper or valve seal, and the toilet refills only occasionally. That means the leak can continue for months with little obvious sound.
EPA WaterSense recommends a dye test as a quick way to identify this issue. The process is simple, inexpensive, and appropriate for any skill level. If you have food coloring in the kitchen, you may already have what you need.
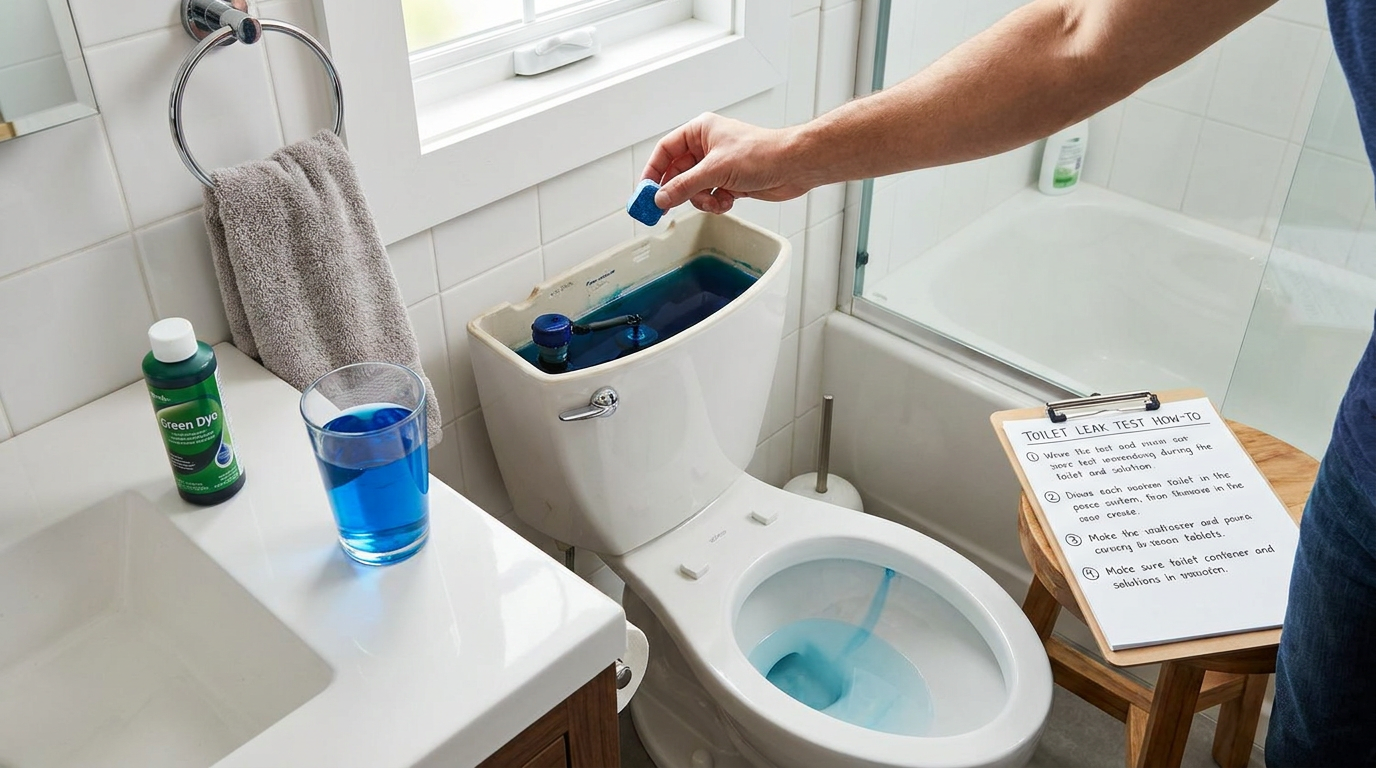
How to do a toilet dye test
Remove the toilet tank lid carefully and set it down somewhere safe. Add several drops of food coloring or a dye tablet into the tank water, then wait about 10 minutes without flushing. If color appears in the bowl, the toilet is leaking from the tank into the bowl.
This is often caused by a worn flapper, a dirty valve seat, or an improperly adjusted fill mechanism. Even if you do not plan to repair it yourself, the test gives you a clear answer and helps you decide whether to call a plumber. For a low-effort maintenance routine, it is worth testing every toilet in the home once or twice a year, especially if your water bill seems inconsistent.
Remember that toilets can leak silently. This is one of the most important misconceptions to let go of. The absence of a constant running sound does not mean the toilet is functioning properly.
Inspect exposed plumbing and high-risk fixtures
After testing the meter and toilets, the next step is a slow, visible inspection of the plumbing you can easily access. You are not looking for dramatic failures. You are looking for early signs such as moisture, corrosion, staining, mineral deposits, soft cabinet material, musty odor, or a slow drip forming at a connection point.
EPA WaterSense specifically recommends checking faucet gaskets, pipe fittings, and visible moisture or mold under sinks and around appliances. These inspections are especially valuable in homes with older plumbing, aging supply lines, or fixtures that see frequent use. The process does not require tools beyond perhaps a flashlight and a dry paper towel.
Where to look first
-
Under bathroom and kitchen sinks, especially around shutoff valves, supply lines, and drain connections.
-
At the base of faucets, where worn seals can cause slow drips or seepage into counters and cabinets.
-
Behind and beneath washing machines, where hoses and drain connections can loosen over time.
-
Around dishwashers, especially along the front edge of cabinetry and under the sink where the supply line connects.
-
Near water heaters, where small leaks often start at fittings, pressure relief valves, or the tank itself.
-
Around refrigerators with ice makers or water dispensers, where a hidden line may slowly seep.
-
At outdoor hose bibs and nearby interior walls, especially after winter freeze-thaw cycles.
As you inspect, run your hand carefully around connections and use a paper towel to detect slight moisture that may not be visible. A dry cabinet floor does not always mean there is no issue because very small leaks may dry between uses or collect along the back edge where they are hard to see. A flashlight helps reveal mineral buildup, darkened wood, or tiny beads of water.
Listen as well as look. A faint hiss, drip, or intermittent refill sound can be revealing when the house is quiet. Sometimes leaks announce themselves more clearly at night, early in the morning, or when appliances are not competing with background noise.
Do not ignore subtle warning signs in walls, floors, and ceilings
Non-invasive leak detection also includes noticing changes in finished surfaces. While this guide avoids opening walls or taking apart assemblies, your home often gives clues when moisture is present behind those surfaces. The key is learning to interpret these clues early rather than waiting for obvious damage.
Watch for paint bubbling, drywall staining, warped baseboards, loose floor planks, musty smells, or areas that feel unexpectedly cool or damp. Around bathrooms, kitchens, and laundry zones, these signs deserve extra attention because they often appear near hidden plumbing lines. On upper floors, even a minor supply or drain issue can show up on the ceiling below before anyone notices the source above.
It is also worth paying attention to patterns. A stain that grows after someone showers, a floor area that feels damp after laundry runs, or a wall that smells musty during humid weather may help you connect the symptom to the plumbing event causing it. You do not need specialized equipment to observe these relationships. Patience and consistency often reveal enough to know when professional help is needed.
Check appliances and utility spaces carefully
Some of the costliest leaks begin around appliances because they are out of sight and used routinely. Washing machines, water heaters, dishwashers, and refrigerators with water lines all deserve periodic inspection. These areas are often easy to miss because they can be visually crowded, awkward to access, or tucked behind doors and in utility closets.
Start by checking the floor around the appliance. Then inspect hose connections, valves, visible fittings, and any nearby drain or pan. If you can safely see behind the appliance without moving it excessively, look for staining, corrosion, or dirt trails that suggest repeated moisture.
Water heaters deserve particular attention because even a minor seep can worsen over time. Look for dampness near the base, rust around fittings, and any sign that water has run into the surrounding floor area. If your heater is in a finished basement or utility closet, early detection matters even more because small leaks can spread quietly into adjacent materials.
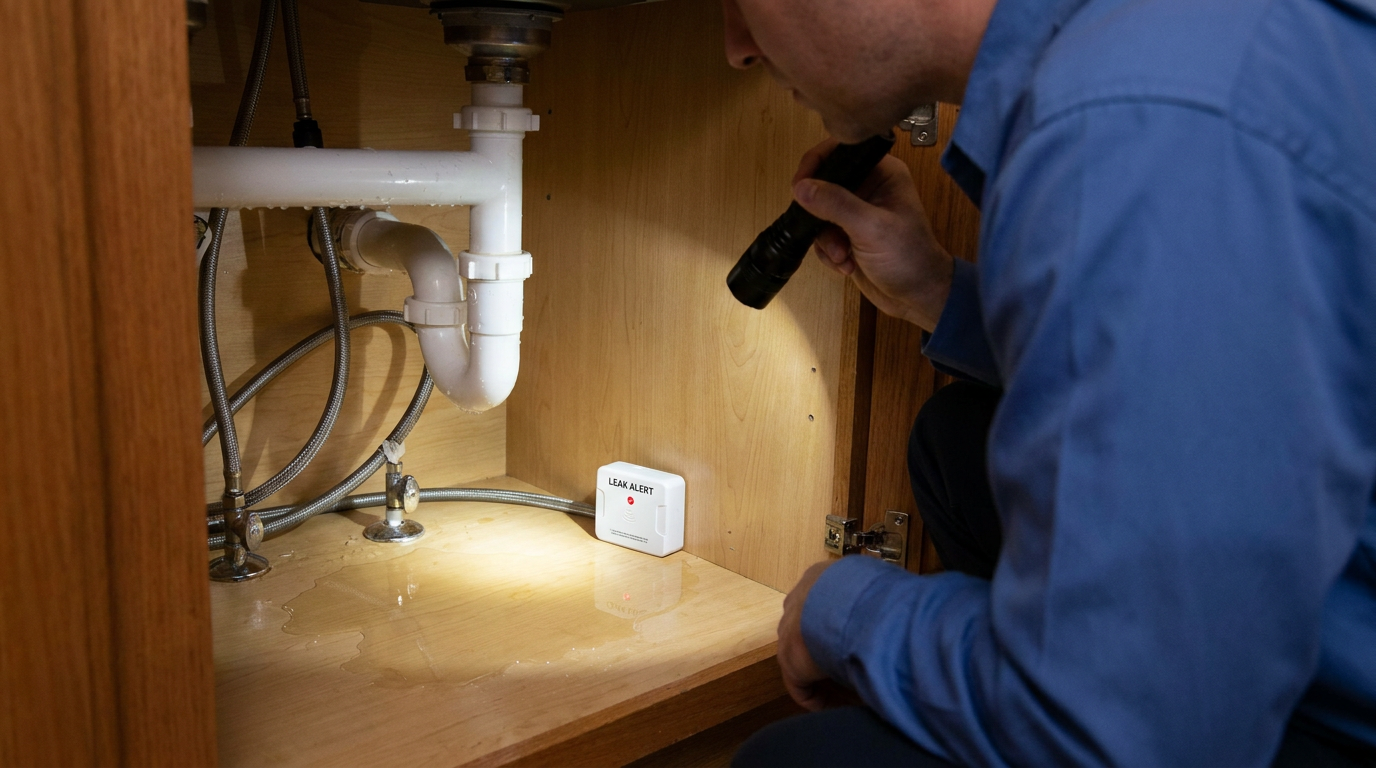
Use simple leak alarms as a smart next step
If you want more peace of mind without committing to a full smart-home system, water alarms and moisture sensors are an excellent middle ground. Government of Canada guidance explains that water alarms or leak detectors use sensors to detect unwanted water and can provide early detection before a small issue becomes a costly one. For many households, this is one of the most practical upgrades available.
These devices are usually small, affordable, and easy to place in high-risk areas. They do not replace meter checks or inspections, but they do add another layer of protection in places you do not see every day. A basic alarm can sound when moisture reaches the sensor, while more advanced versions can send an alert to your phone.
Best places to install leak alarms
-
Inside sink cabinets in kitchens and bathrooms.
-
Behind the washing machine.
-
Near the water heater.
-
By the dishwasher or refrigerator water line.
-
Near basement floor drains or sump areas where water tends to collect first.
The value of these sensors is simple. They shorten the time between when a leak begins and when you know about it. That time difference can be the reason a leak becomes a quick repair instead of a flooring replacement.
Are smart leak detectors necessary?
Not necessarily. One of the biggest misconceptions around leak detection is that effective monitoring requires expensive technology. In reality, a basic water meter test and toilet dye test can identify many common leaks with no advanced equipment at all. Smart devices are helpful, but they are optional.
That said, newer flow-monitoring devices and automatic shutoff systems are becoming more accessible. EPA WaterSense materials describe moisture-detection devices for leak-prone locations and in-line flow monitors that can identify leaks associated with water use after the meter. For households with second homes, frequent travel, finished basements, or a history of water damage, these systems can be worthwhile.
A balanced approach is often best. Start with the low-cost manual methods that everyone can do. Then add simple sensors in the areas most likely to cause damage. If your home layout or lifestyle creates higher risk, consider a connected monitoring system or automatic shutoff valve as the next layer of protection.
A practical leak detection routine for every season
Leak detection is most effective when it becomes a light routine rather than a one-time reaction. You do not need to inspect everything every week. Instead, think in terms of small recurring checks tied to normal household rhythms such as monthly bills, seasonal changes, and times when the home is quieter.
Seasonal awareness matters because some leaks become more noticeable when conditions shift. Outdoor faucets and exposed pipes may show problems after winter. Basement and foundation moisture may become more obvious during rainy periods. Appliance leaks may reveal themselves when family routines change and the house is used differently.
A simple maintenance rhythm
-
Each month, glance at your water bill or usage app for unexplained changes.
-
Every few months, look under sinks and around major appliances.
-
Twice a year, perform a whole-home water meter test.
-
Once or twice a year, run a dye test on every toilet.
-
Before travel or long absences, inspect high-risk zones and confirm sensors are working.
This kind of routine is realistic for most people. It asks for awareness, not expertise. Over time, it also helps you become more familiar with what is normal in your home, which makes unusual moisture, sounds, or bills easier to catch early.
What to do if you confirm a leak
Once you identify a likely leak, the next step depends on the source and severity. A dripping faucet, running toilet, or loose visible connection may be something you choose to repair yourself if you are comfortable doing so. Many toilet flapper replacements and minor gasket fixes are straightforward, inexpensive, and widely documented.
If the leak involves a supply line inside a wall, recurring moisture near a ceiling, signs of active appliance failure, or any situation where water is collecting quickly, it is wise to contact a licensed plumber promptly. The same applies if you cannot identify the source but your water meter continues to move during no-use periods. Non-invasive leak detection is excellent for finding warning signs, but it does not eliminate the need for professional diagnosis when the source is hidden.
If there is active leaking that could damage finishes or electrical systems, shut off the nearest fixture valve if you can identify it safely. For a larger issue, use the home’s main water shutoff. Knowing where that shutoff is located before an emergency happens is one of the most useful forms of home preparedness.
Common misconceptions that lead people to wait too long
Many people delay action because the signs do not seem dramatic enough. A small drip feels manageable. A toilet that only occasionally refills seems harmless. A mild smell under the sink can be easy to rationalize. Unfortunately, these are exactly the kinds of signals that often precede more expensive damage.
Another common misconception is that no puddle means no leak. In practice, leaks often occur inside toilet tanks, behind appliances, within cabinets, or inside wall cavities where water spreads slowly and evaporates before it becomes obvious. By the time a puddle appears in open view, the leak may have been active for quite a while.
It is also easy to assume that a high water bill must be a utility error or meter problem. While billing issues can happen, elevated use is often the first clue that a fixture, toilet, or line is leaking after the meter. The practical response is not to speculate. It is to test.
Quiet leaks are still real leaks. If something seems slightly off, a calm 20-minute inspection now can save you from weeks of disruption later.
Leak detection as part of a more sustainable home
There is a practical kind of sustainability that begins with maintenance. It is not about perfection and it does not require major renovations. It starts with paying attention to the systems that support daily life and keeping them efficient, safe, and durable. Leak detection fits squarely into that idea because it protects water, energy, materials, and household finances all at once.
When a leak is fixed early, less treated water is wasted. Less moisture reaches finishes and structural materials. Fewer components need to be replaced prematurely. In many cases, a simple repair prevents a chain reaction of disposal, remediation, and rebuilding. That is one reason small maintenance habits often have an outsized environmental benefit.
For homeowners trying to make more climate-conscious decisions without taking on large projects, this is encouraging. You do not need to overhaul your plumbing system to make a meaningful difference. A few regular checks, some basic sensors, and a willingness to investigate small changes can make your home more resilient and more efficient.
Your step-by-step leak detection checklist
If you want a clear sequence to follow, use this simple workflow. It is built around the most useful non-invasive methods and works well whether you are investigating a suspicion or creating a maintenance routine from scratch.
-
Review your recent water bills and note any unusual increase in usage.
-
Perform a two-hour water meter test with all water use turned off.
-
Run a dye test on every toilet to check for silent leaks.
-
Inspect exposed plumbing under sinks and around visible fixture connections.
-
Check appliances and utility spaces, including washing machines, dishwashers, refrigerators, and water heaters.
-
Look for subtle signs such as stains, odor, warped materials, or intermittent sounds.
-
Place leak alarms in high-risk areas if you want ongoing low-effort monitoring.
-
Call a plumber if the meter indicates a leak and you cannot locate the source, or if you see signs of hidden or active damage.
This sequence works because it moves from broad to specific. You begin with simple household-level clues, then confirm with the meter, then narrow the search by fixture and location. It is methodical, accessible, and effective for a wide range of homes.
Final thoughts
Water leaks have a way of blending into everyday life until they become too large to ignore. That is why the best approach is not dramatic action. It is steady awareness. A quick meter check, an occasional toilet dye test, and a few moments spent looking under sinks can prevent a surprising amount of waste and damage.
The most reassuring part is that leak detection does not have to be invasive or complicated. Anyone can learn the basics, and most of the highest-value checks take very little time. In a well-cared-for home, these simple routines support comfort, conservation, and long-term durability in equal measure.
If you have been putting this off, start with one thing today. Check your latest bill. Open the cabinet under the kitchen sink. Test one toilet. Practical maintenance works best when it feels manageable, and in the case of leaks, small actions taken early are often the ones that matter most.



No Comment! Be the first one.