



Transform Your Home: Step-by-Step Guide to Upgrading Your Staircase Yourself
Your staircase gets more daily use than most parts of the house, yet it is often treated like a background feature until it starts looking worn, creaking underfoot, or dragging down the rest of the interior. A smart stair upgrade can make an entry hall, living room, or upper landing feel cleaner, brighter, and more finished without taking on a full structural remodel. It can also improve safety, which matters because stairs are part of the home’s fall protection and exit path, not just a decorative detail.
Table Of Content
- Why a Staircase Upgrade Has Such a Big Impact
- Start With Code, Safety, and a Reality Check
- Decide What Kind of Stair Upgrade You Are Actually Doing
- Plan the Style Without Forgetting Durability
- Tools and Materials You Will Likely Need
- Basic Planning Checklist
- Measure the Existing Stairs Carefully Before You Buy Anything
- Remove Old Finishes Without Damaging the Stair Structure
- Repair the Base Before Installing New Finish Parts
- Install New Risers and Treads in a Logical Sequence
- Typical Installation Order
- Handrails, Balusters, and Guard Details Deserve Extra Attention
- Do Not Ignore Lighting and Visibility
- Paint, Stain, and Protective Finishes
- Common DIY Stair Upgrade Mistakes to Avoid
- Watch Out for These Specific Problems
- Budgeting the Project Honestly
- Step-by-Step Project Flow for a Homeowner
- When You Should Stop and Call a Pro
- Final Walkthrough and Quality Check
- Conclusion
That is what makes this project worth doing carefully. Homeowners can absolutely handle many staircase upgrades themselves, especially when the work is focused on tread and riser replacement, trim, paint, stain, handrail refreshes, lighting improvements, and other retrofit work. The key is understanding where a staircase is cosmetic and where it becomes code sensitive, because changing dimensions, railings, nosings, or headroom can create real problems if you move ahead without checking the rules first.
This guide is built for practical homeowners who want straight answers and a clear path from planning to final finish. We will cover what to inspect before touching anything, which tools and materials make the job manageable, how to remove old finishes without damaging the structure, and how to install new parts so the staircase looks clean and feels solid. We will also cover the common mistakes that make a stair job look amateur or, worse, create trip hazards that could have been avoided.
Important: In North America, stairs are governed by building code because they are part of the home’s egress and fall safety system. Before changing tread depth, riser height, width, handrails, balusters, landings, or structural framing, verify your local code and permit requirements. In many U.S. jurisdictions, the 2024 IRC commonly requires a maximum riser height of 7 3/4 inches, a minimum clear width of 36 inches above the handrail zone, a minimum headroom of 6 feet 8 inches, and handrails on at least one side of stair flights with four or more risers.
That warning is not there to scare you off. It is there because a good DIY stair project starts with facts, not guesses. If you stay within the right lane and focus on careful measuring, consistent installation, secure fastening, and clean finishing, a staircase upgrade is one of the most satisfying carpentry projects you can do in your home.
Why a Staircase Upgrade Has Such a Big Impact
A staircase sits right at the intersection of structure, circulation, and design. People see it every day, they touch it every day, and they rely on it every day. When the treads are scuffed, the risers are chipped, the handrail is loose, or the lighting is dim, the whole area feels tired even if the rest of the home has been updated.
Upgrading the staircase can sharpen the look of nearby spaces because stairs often connect the main floor to bedrooms, a basement, or a loft. New wood treads can add warmth, painted risers can brighten a dark hall, and better railings can modernize the whole visual line of the house. In practical terms, improved slip resistance, secure rails, and more consistent surfaces can make the stairs feel safer for children, guests, and older family members.
This is also one of the few home improvements where modest material changes create outsized results. You are not remodeling an entire kitchen footprint or reworking mechanical systems. In many homes, you are refinishing or replacing a relatively compact run of visible surfaces, which means careful labor matters more than sheer square footage.
Start With Code, Safety, and a Reality Check
Before choosing paint colors or hardwood species, inspect the staircase as a system. Look at tread depth, riser height, width, headroom, handrail placement, baluster spacing, landing condition, and how the stringers feel under load. If the stair run is uneven now, you need to know whether you are dealing with cosmetic wear or a deeper framing issue that should be corrected by a professional.
For many homeowners, the safest DIY path is to upgrade surfaces and components without changing the core geometry of the stairs. That means using replacement treads sized to match existing dimensions, resurfacing risers, replacing trim, upgrading the handrail where local rules allow, improving lighting, and adding slip resistant finishes. Once you start changing dimensions, especially riser heights or tread depths, you can easily create nonuniform steps that become a trip hazard.
Uniformity matters more than people realize. A staircase feels safe when each step behaves exactly like the last one. Even a small difference between risers can throw off your stride, especially when going down. One of the most common misconceptions is that you can fix one damaged step independently without checking the effect on the rest of the flight. In reality, any added overlay, thick tread cap, or flooring build-up can alter the math enough to create trouble.
Older homes deserve extra caution. Some remodel codes allow limited alterations where the existing space does not allow a full reduction in pitch or slope, but that does not mean anything goes. It means you need to understand what the local building department will accept and where a permit, inspection, or design review may be required.
Decide What Kind of Stair Upgrade You Are Actually Doing
Not every staircase project is the same, and your plan should match the condition of the existing stairs. One homeowner may simply need to remove carpet, install new treads and risers, caulk trim joints, and paint. Another may need a larger refresh with new balusters, a new handrail, and brighter lighting. A third may discover sagging stringers, loose framing, or out-of-level landings that push the work beyond basic DIY territory.
In practical terms, most homeowner stair upgrades fall into four categories. The first is a cosmetic refresh, where you repair, sand, stain, or paint what is already there. The second is a surface replacement, where you install new treads, riser skins, nosings, and trim over or in place of worn materials. The third is a railing update, where the look and feel improve through new handrails, balusters, and newel details. The fourth is a hybrid project, where all of those changes happen together while the structural frame remains intact.
The right category depends on what you see after a close inspection. If the stairs are solid and the dimensions are consistent, a surface replacement can produce a near custom look. If the frame itself moves or squeaks heavily, take time to correct that before spending money on finish materials.
Plan the Style Without Forgetting Durability
Good stair design is not just about what photographs well. It has to stand up to foot traffic, cleaning, seasonal movement, and the occasional dropped item. A clean painted riser with a wood tread remains one of the most practical combinations because it balances durability with a bright finish. Matte or satin finishes also tend to be more forgiving than high gloss, especially in family homes.
Current stair trends lean toward warm wood tones, black metal railing details, simple trim lines, and cleaner profiles overall. Engineered wood treads and retrofit systems are also becoming more common because they can simplify installation and reduce finishing time. That said, trend chasing should never come ahead of build quality. A simple stair done neatly will age better than a flashy one assembled in a rush.
Think about maintenance before you buy materials. Dark paint on high traffic stair risers may show scuffs. Very soft wood treads may dent faster. Highly glossy polyurethane can highlight every scratch and footprint. If the staircase is the main route through the house, prioritize finishes that look good with real use, not just on day one.
Tools and Materials You Will Likely Need
Your exact list depends on the scope of the job, but most DIY stair upgrades call for the same core set of tools. Good measuring tools matter more here than on many other carpentry jobs because stair work depends on repeatable dimensions and crisp fitting. A tape measure, combination square, digital angle finder, level, chalk line, and a story stick for repeated measurements will save time and help you avoid accumulated errors.
For removal and fitting, expect to use a pry bar, hammer, oscillating multi-tool, utility knife, drill driver, circular saw, jigsaw, and possibly a miter saw or table saw if you are cutting your own trim and treads. If you are refinishing old wood, add a random orbital sander, sanding blocks, a shop vacuum, and dust control materials. For installation, keep construction adhesive, finish nails or trim screws, wood filler, caulk, clamps, and the right fasteners for railing hardware close at hand.
Material choices usually include solid wood treads, engineered treads, riser boards or skins, stair nosings if needed, skirt boards, base trim, balusters, rail parts, primer, paint, stain, and clear topcoat. If you are covering a previously carpeted stair, inspect the substrate carefully before ordering overlays. Some retrofit kits work best on sound, square existing framing with predictable dimensions.
Basic Planning Checklist
- Measure every tread depth and riser height individually
- Check total stair width and available headroom
- Inspect the stringers and landing for movement or damage
- Confirm local code requirements before altering railings or dimensions
- Decide whether you are repainting, resurfacing, or replacing components
- Order materials with waste allowance for cuts and mistakes
- Plan how the household will move between floors during the project
Measure the Existing Stairs Carefully Before You Buy Anything
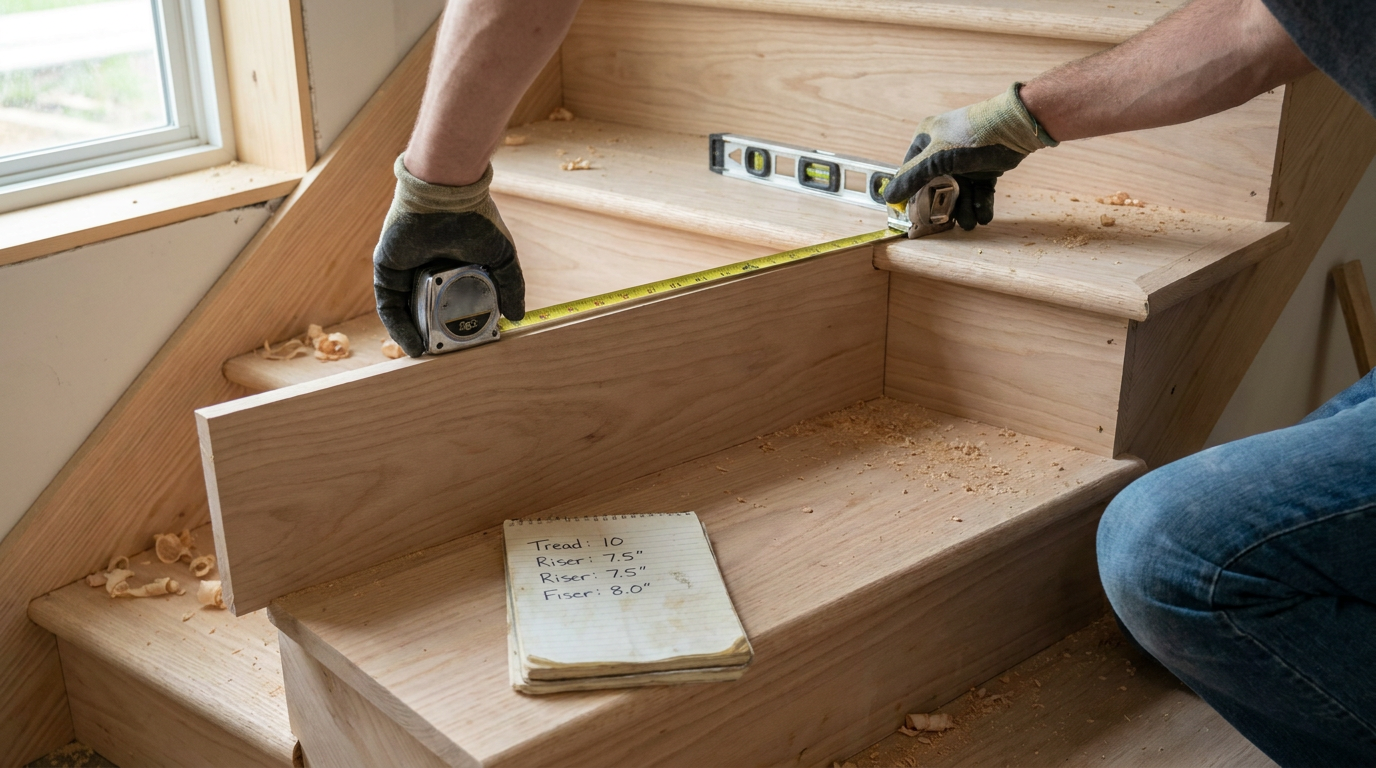
This is where many stair projects succeed or fail. Do not assume every step matches the others, especially in older homes. Measure each riser height from tread surface to tread surface and each tread depth from nosing to riser. Record everything in a notebook and mark any step that is visibly different. Also measure the width at the back and front of each tread because walls and stringers are not always perfectly parallel.
Take note of existing nosing projection, handrail height, baluster spacing, and the thickness of any materials you plan to add. If you install tread overlays or thicker finish materials, you are changing the surface heights. That can affect the bottom step, top step, and every riser in between, which is why planning the whole system matters.
Use a long level or straightedge to check for sagging or hump points. If one tread crowns badly or a landing slopes, a finished upgrade may still look off unless the base issue is corrected. This measuring stage can feel slow, but it is much cheaper than cutting expensive hardwood twice.
Remove Old Finishes Without Damaging the Stair Structure
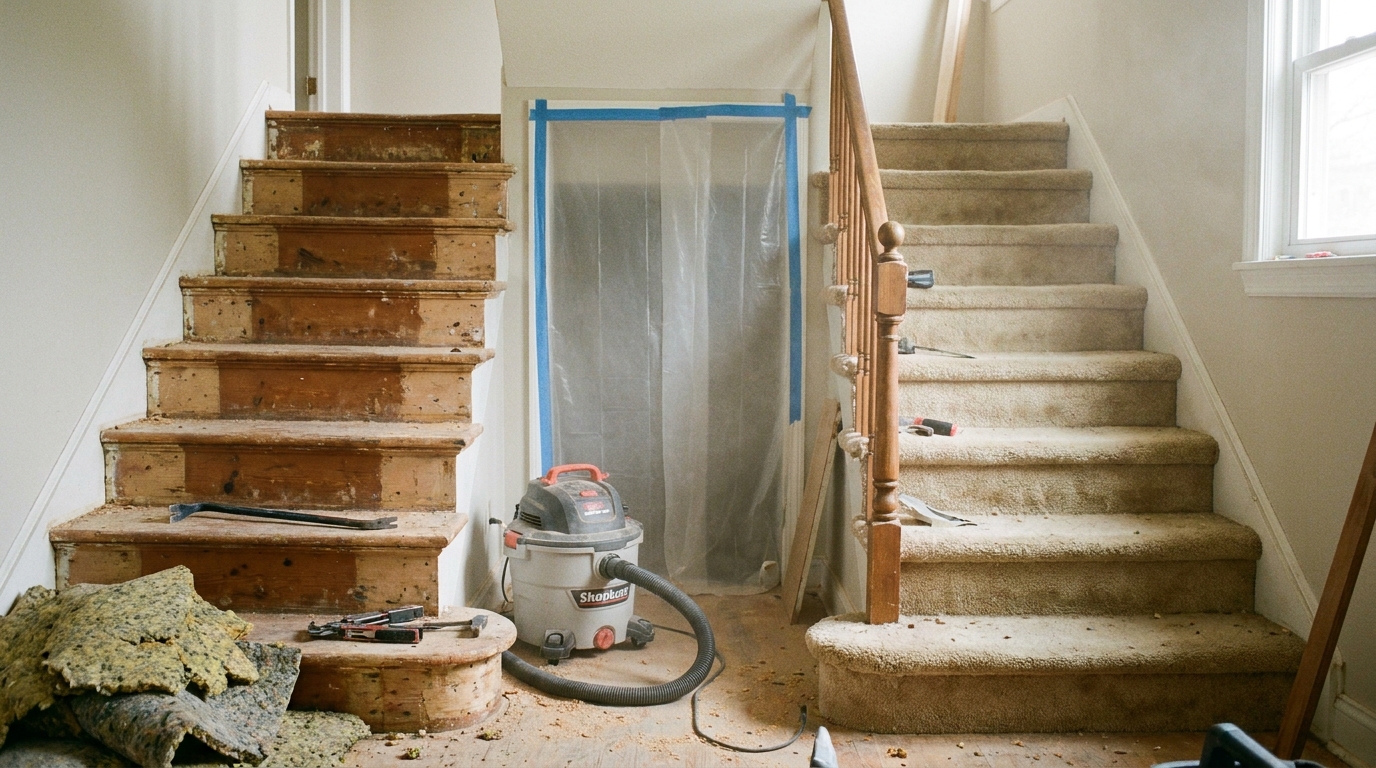
If the staircase is carpeted, start by removing the runner or wall-to-wall carpet carefully. Pull staples and tack strips fully so they do not interfere with later fitting. Vacuum thoroughly because hidden grit and old adhesive can affect measurements and make new materials sit unevenly.
When removing old treads or risers, work methodically. Score paint lines first so adjacent trim and drywall are less likely to tear. Use an oscillating tool to cut nails or adhesive lines where needed rather than forcing pieces out and splintering the stringers. Keep in mind that not every old stair can be disassembled cleanly. In some homes, it makes more sense to leave structurally sound base components in place and install carefully fitted retrofit parts over them.
This is also the right time to chase squeaks. Most squeaks come from movement between treads, risers, and stringers. Refasten loose joints with appropriate screws from accessible faces, add adhesive where assemblies allow it, and tighten any visible framing connections below if the stair underside is exposed. Quieting the staircase before finish materials go on will make the final result feel far more solid.
Repair the Base Before Installing New Finish Parts
A stair upgrade only looks professional when the underlying structure is stable and reasonably true. Inspect the stringers for splits, water damage, excessive notching, or signs of movement where they meet the floor framing. Minor patching is one thing. Structural weakness is another. If you find cracked framing or major deflection, stop and bring in a qualified carpenter or structural professional.
For sound stairs, make the base as consistent as possible. Fill old fastener holes where they will interfere with new work, plane or sand down small high spots, and shim localized low areas where recommended by the retrofit system you are using. Dry fit a few key pieces before moving on to full installation. A staircase magnifies visual errors because every line repeats from step to step.
Also check walls along the stairs. If the skirt boards are staying, clean them up and repair dents now. If you are replacing them, use the old layout as a reference but verify it against actual stair geometry. Nothing makes a stair project feel sloppy faster than trim that telegraphs uneven gaps all the way up the run.
Install New Risers and Treads in a Logical Sequence
Most retrofit stair projects go more smoothly when you establish a repeatable sequence and stick to it. Dry fit every part first, label each piece, and confirm that reveal lines and overhangs are consistent. Depending on your product and stair layout, many installers find it easiest to start at the top and work downward so they are not standing on fresh finished surfaces more than necessary. Others prefer a bottom-up sequence if the system is designed that way. Follow the manufacturer’s guidance where applicable.
Start by fitting the risers so the vertical faces are square, flush, and free of visible bows. Then fit each tread carefully, checking the front nosing line against the adjacent steps. Use adhesive and the recommended mechanical fastening method, but do not overdrive nails or screws and crush the material. If you are using solid wood, account for seasonal movement and follow spacing guidance from the manufacturer.
Take your time on the side cuts. In many houses, walls are slightly out of plumb and stringers are not perfectly straight, so every tread may need a custom fit. Scribing can save you from ugly caulk lines later. It is slower work, but it is what separates a thoughtful DIY stair from a quick cover-up.
Typical Installation Order
- Dry fit and label all risers and treads
- Correct squeaks and substrate issues
- Install risers according to the selected system
- Install treads with consistent nosing alignment
- Add skirt details, trim, and transitions
- Fill, sand, caulk, and prepare for finish
- Install or reinstall handrail and baluster components
- Complete final coating and cure time before full use
Handrails, Balusters, and Guard Details Deserve Extra Attention
Railings are where many attractive DIY makeovers drift into risky territory. A handrail is not just a design accent. It is something people rely on when they lose balance, carry laundry, or use the stairs in low light. That is why handrail location, height, graspability, and secure fastening matter so much.
If your stair flight has four or more risers, many codes require a handrail on at least one side. Depending on the stair layout and drop conditions, guards and balusters may also be required along open sides and landings. Baluster spacing, newel post strength, and connection hardware all affect safety. If you want a more modern rail style, verify that the product and spacing pattern comply locally before ordering.
For a confident DIY result, many homeowners replace like for like in general form while upgrading the finish. That might mean installing a sturdier graspable rail profile, painting existing balusters if they are sound, or replacing them with approved metal balusters that fit the current layout. Avoid guessing on anchor points. A loose handrail ruins the whole job no matter how good the treads look.
Do Not Ignore Lighting and Visibility
One of the simplest ways to make stairs safer is to improve how well people can see each step. Building and maintenance codes often emphasize illumination because poor visibility contributes directly to falls. If your staircase sits in a dark hall or turns at a landing, brighter lighting can be as valuable as the finish upgrade itself.
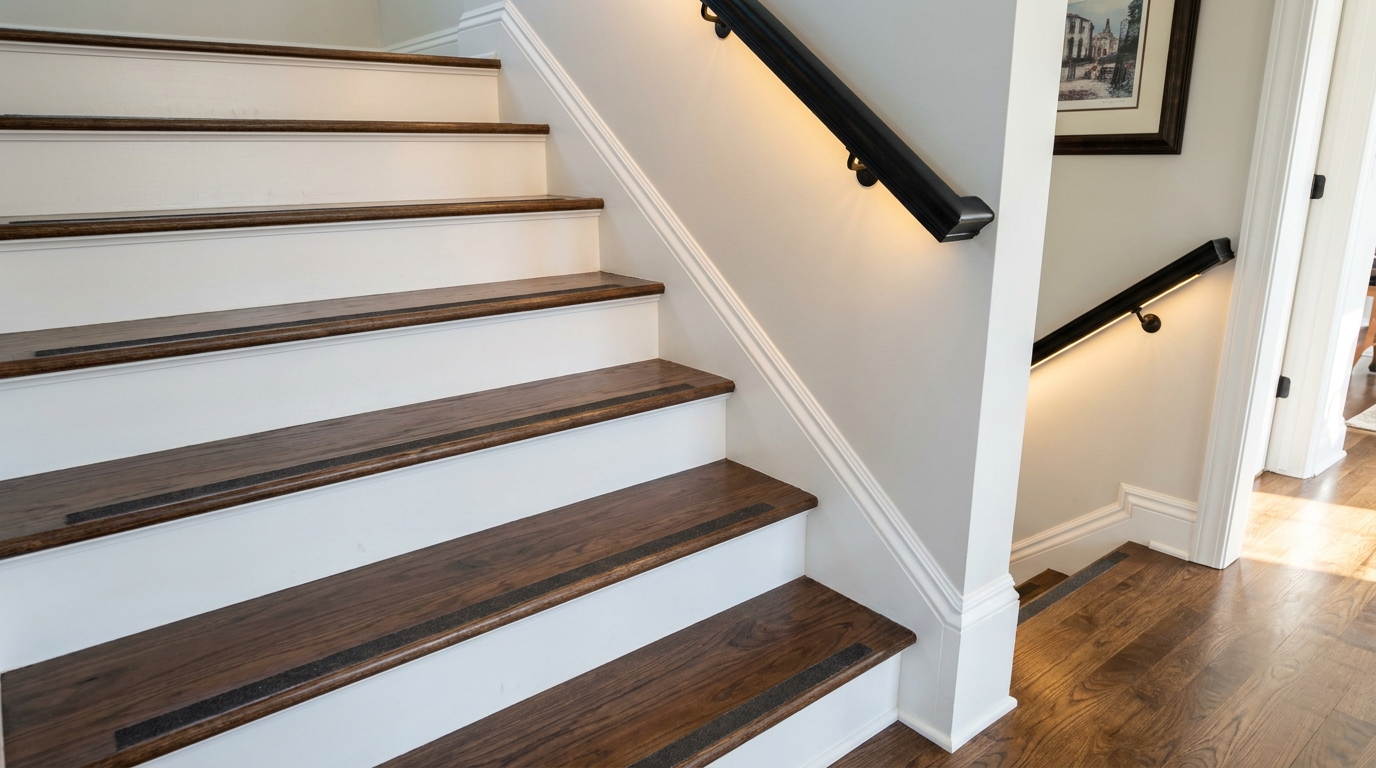
Consider replacing weak overhead fixtures, adding a wall sconce at a landing, or using code-appropriate step lighting where practical. Even a brighter lamp color and a second switch location can improve daily use. High contrast between tread surfaces and risers can also help define edges more clearly, which is one reason the painted-riser and wood-tread combination remains so popular.
If family members are aging in place, think beyond looks. Better rail grip, clear sight lines, and reliable lighting can make the staircase more comfortable long term. Good design is often just good practical thinking done early enough to matter.
Paint, Stain, and Protective Finishes
The finish stage is where patience pays off. If you are staining treads, test the color on scrap or an offcut from the exact material you are using because wood species and factory prep can change the result. Sand consistently, remove dust thoroughly, and apply stain evenly so one step does not end up darker than the next.
For painted risers and trim, use a bonding primer where needed and choose a durable enamel suited to interior trim. Satin and semi-gloss are common for a reason. They clean reasonably well and reflect enough light without exaggerating every small defect. Caulk only where appropriate, especially at trim joints, and keep lines neat.
On tread surfaces, the topcoat matters for both appearance and wear. Use a floor-rated finish where suitable, follow the manufacturer’s cure times, and resist the temptation to rush traffic back onto the stairs too soon. If slip resistance is a concern, choose a finish system or added safety treatment that improves traction without creating an uneven surface profile.
Common DIY Stair Upgrade Mistakes to Avoid
The first big mistake is treating the project like ordinary trim work and ignoring the geometry of the stairs. A staircase is repetitive by nature, which means every inconsistency is visible and every dimensional error can be felt underfoot. Even a beautiful wood tread will not make up for a top step that feels different from the rest.
The second mistake is building over problems instead of fixing them. Overlay systems, fresh paint, and new rail parts are not solutions for soft framing, movement, water damage, or badly worn substrate. If the base is wrong, the finish layer will only hide it temporarily. That always costs more in the end.
The third mistake is underestimating finish quality. Stairs are viewed at close range and used constantly. Gaps at skirt boards, blotchy stain, squeezed-out adhesive, crooked balusters, and loose handrails stand out immediately. Take the extra time to dry fit, scribe, sand, and clean up.
Watch Out for These Specific Problems
- Changing riser heights by adding uneven overlay thicknesses
- Reducing tread depth too much with bulky nosings or runner details
- Installing a handrail that looks good but is not truly graspable
- Using slippery finish products on heavily used stairs
- Leaving old staples, tack strip nails, or debris under new materials
- Skipping lighting improvements on a dark stair run
- Failing to verify permit and inspection requirements for railing changes
Budgeting the Project Honestly
One reason homeowners tackle staircase upgrades themselves is cost. Labor for finish carpentry and stair work can be significant because fitting is slow and precision matters. Doing the work yourself can reduce that cost substantially, but only if you budget for decent materials, the right tools, waste from mistakes, and enough time to do the work carefully.
The main cost variables are the number of steps, whether you are refinishing or replacing surfaces, the tread material, the railing package, trim complexity, and the finish system. Solid hardwood treads, custom handrails, and premium metal balusters can raise the price quickly. Paint-grade parts, riser skins, and carefully selected retrofit treads can keep the project in a more manageable range without looking cheap when installed well.
Also put value on what you cannot see in a showroom photo. Dust control supplies, fasteners, adhesive, sanding discs, primer, and replacement blades add up. So does the household inconvenience if the only stair in the home is partially out of service for several days. A realistic budget keeps the project moving and helps you avoid midstream shortcuts.
Step-by-Step Project Flow for a Homeowner
If you want the broad process in order, here is the practical way to think about it. Start by documenting the existing staircase thoroughly with photos and measurements. Confirm your local code obligations, especially if railings, open sides, or dimensions may change. Then settle the design, order materials, and plan the work so the household can still function.
Next, remove old finishes or coverings carefully and inspect the staircase fully once it is exposed. Fix squeaks, movement, damaged substrate, and trim issues before adding anything new. Dry fit your replacement parts, label them, and install them in a controlled sequence with repeated checks for fit, alignment, and consistency. Only after the carpentry is solid should you move into sanding, filling, finishing, and final paint work.
Finish with the details that make the stairs feel complete. Reinstall or upgrade the handrail securely, tune the lighting, walk every step slowly, and check for movement, noise, or sharp transitions. A finished stair should not just look upgraded from across the room. It should feel predictable and safe every time someone uses it.
When You Should Stop and Call a Pro
There is no shame in knowing where the DIY line ends. If you uncover structural stringer damage, major settling, severe out-of-square conditions, loose landings, or a railing system that you cannot anchor properly, bring in a professional. The same goes for projects where you want to change the stair pitch, rebuild the run, open the stair, or create a floating stair look. Those are design and code heavy changes, not just finish work.
You should also step back if local permitting is required and the scope pushes beyond your confidence. Stairs are too important to wing it. A consultation with a carpenter, stair specialist, or building inspector early in the process can save you from expensive rework later.
In many homes, the smartest approach is a hybrid one. You handle demolition, prep, painting, and some finish work, and a specialist handles the structural or code critical pieces. That is still a very practical homeowner project, and it often produces the best balance of cost, safety, and final quality.
Final Walkthrough and Quality Check
Before calling the project finished, inspect the staircase in daylight and at night with the lights on. Walk up and down slowly and pay attention to whether any step feels different. Check tread attachment, riser fit, trim joints, paint coverage, railing firmness, and lighting performance. If a detail catches your eye now, it will catch your eye every day after this.
Run your hand along the rail and nosing edges. You are looking for rough spots, proud fasteners, chipped finish, or anything that feels unfinished. Clean off adhesive residue, touch up paint where needed, and let the coatings cure fully. It is tempting to rush the final stage because the visible transformation is already there, but this last quality check is what separates a completed project from a half-finished one.
Once done properly, a staircase upgrade pays you back every single day. It changes the feel of the house, improves wear surfaces in a high traffic zone, and often makes the home feel newer than the project budget would suggest. More important, it gives you a staircase that looks better because it was built back with care, consistency, and respect for how stairs are actually used.
Conclusion
Upgrading your staircase yourself is one of the best high impact carpentry projects for a homeowner who wants visible results without taking on a full addition or gut renovation. The work is very manageable when you stay organized, respect the code sensitive parts of the stair, and focus on careful fitting rather than shortcuts. Strong planning, accurate measuring, and solid finishing are what make the difference.
If you remember one thing, make it this: stairs are not just another decorative surface. They are part of the home’s safety system. Treat them that way, and your finished project will not only look sharp but also feel dependable underfoot for years to come.


No Comment! Be the first one.